

Tap to Pay on iPhone
Tap to Pay turns an iPhone into a card terminal. The customer taps their card (or phone or watch) on yours, and the payment lands against the invoice - powered by Windcave, no extra hardware.
Setting up
Section titled “Setting up”Everything happens in the mobile app under Settings → Tap to Pay:
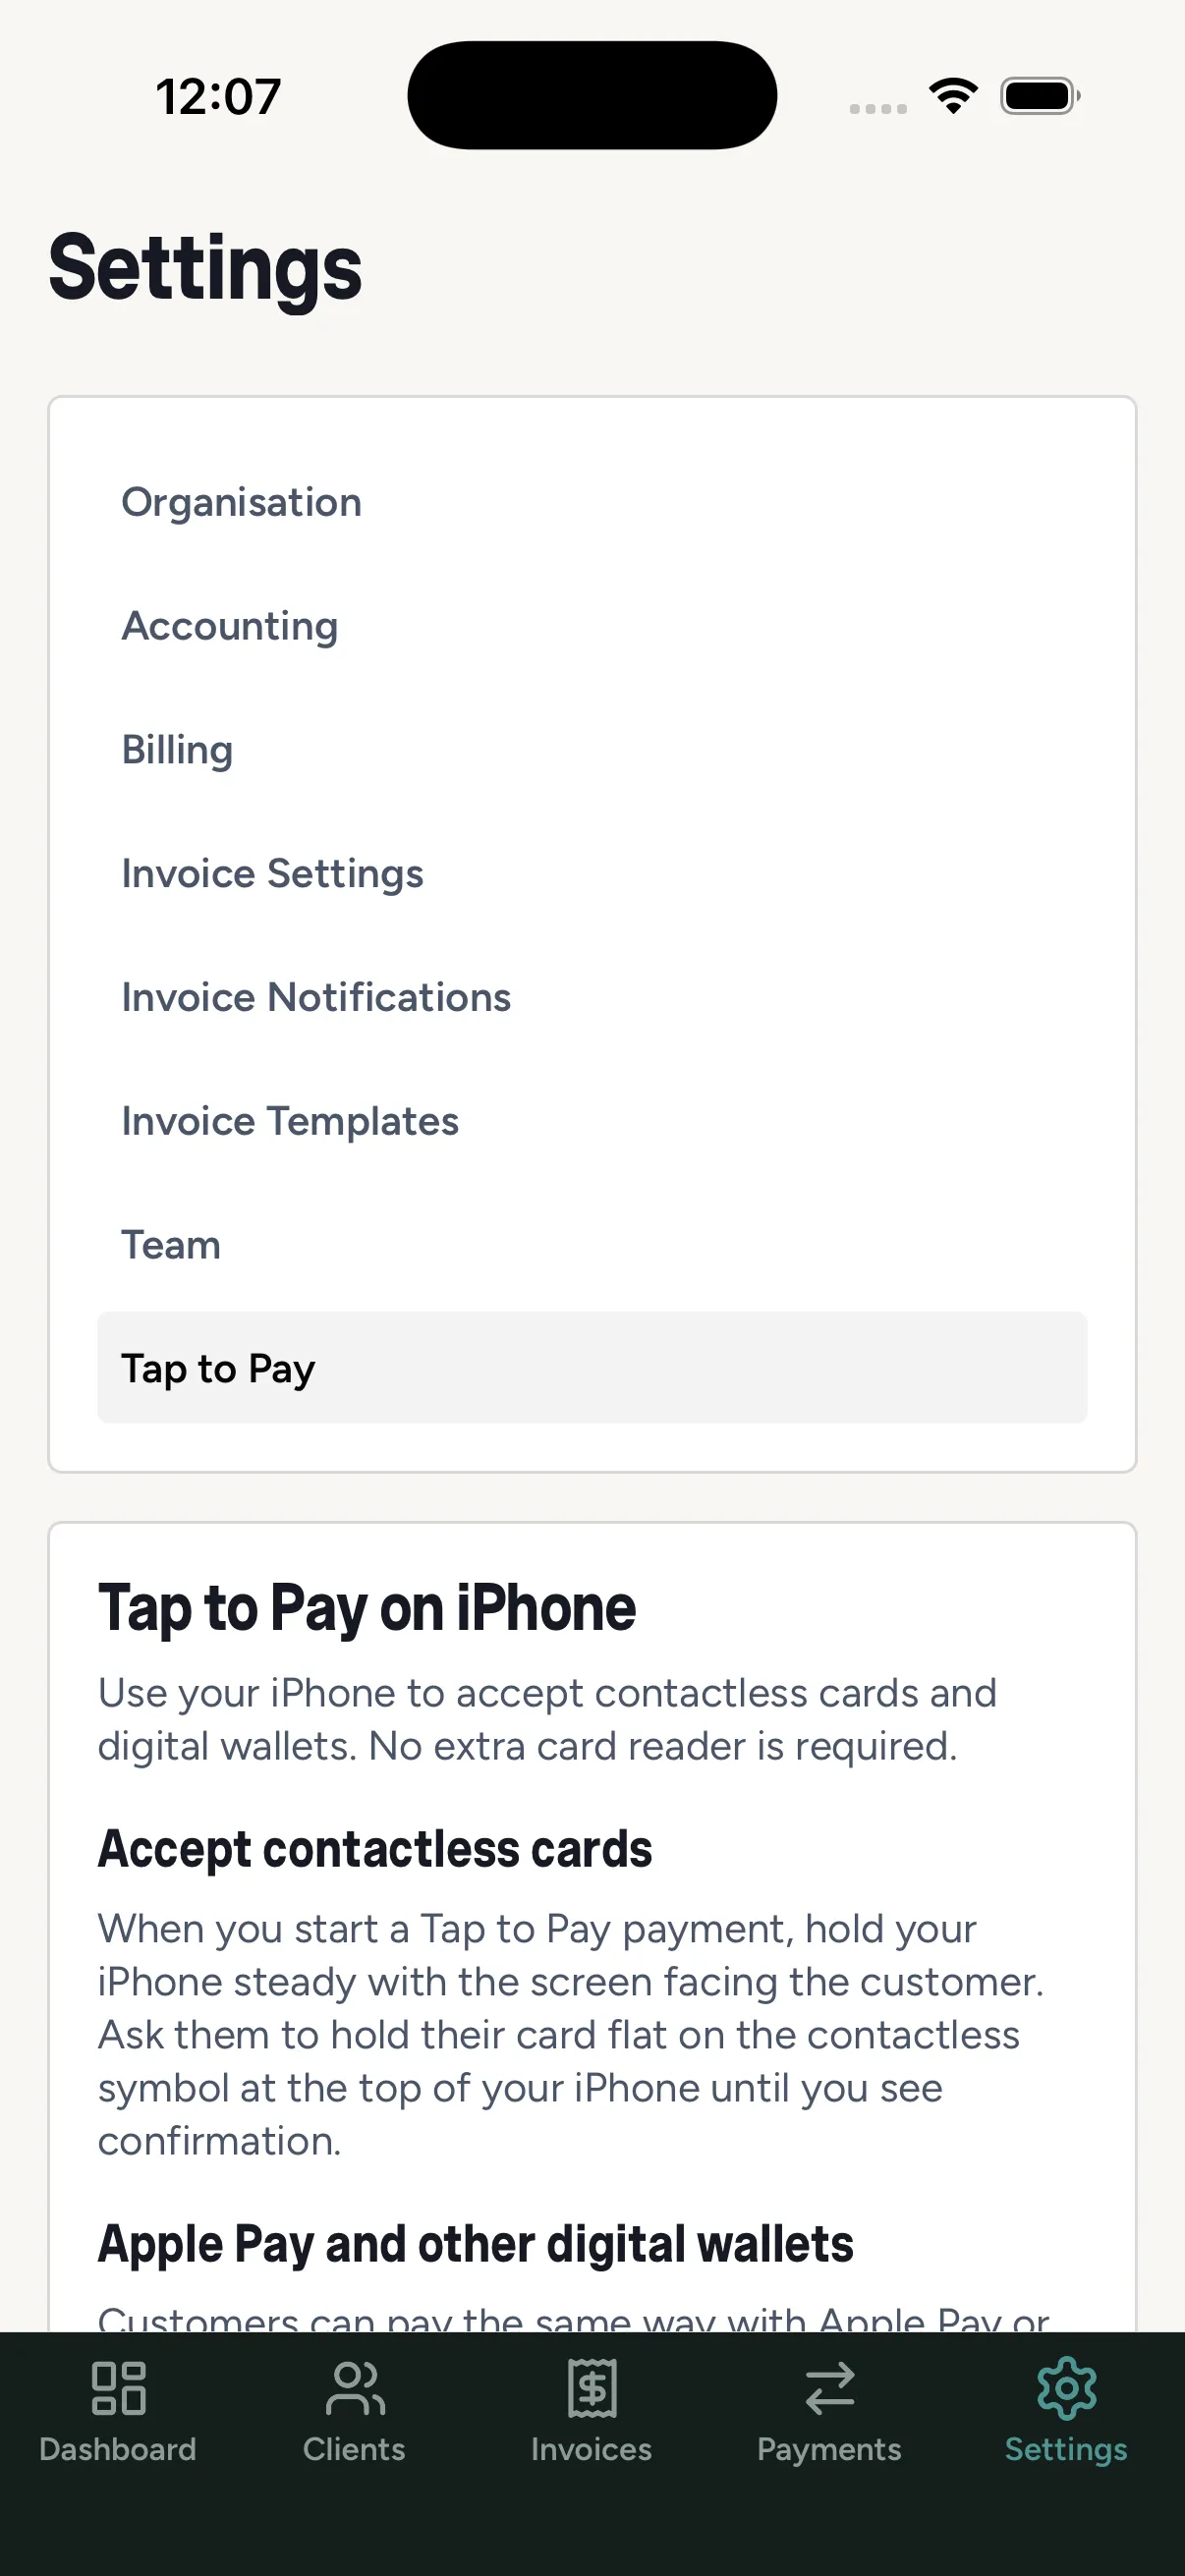
- Open Settings → Tap to Pay on your iPhone.
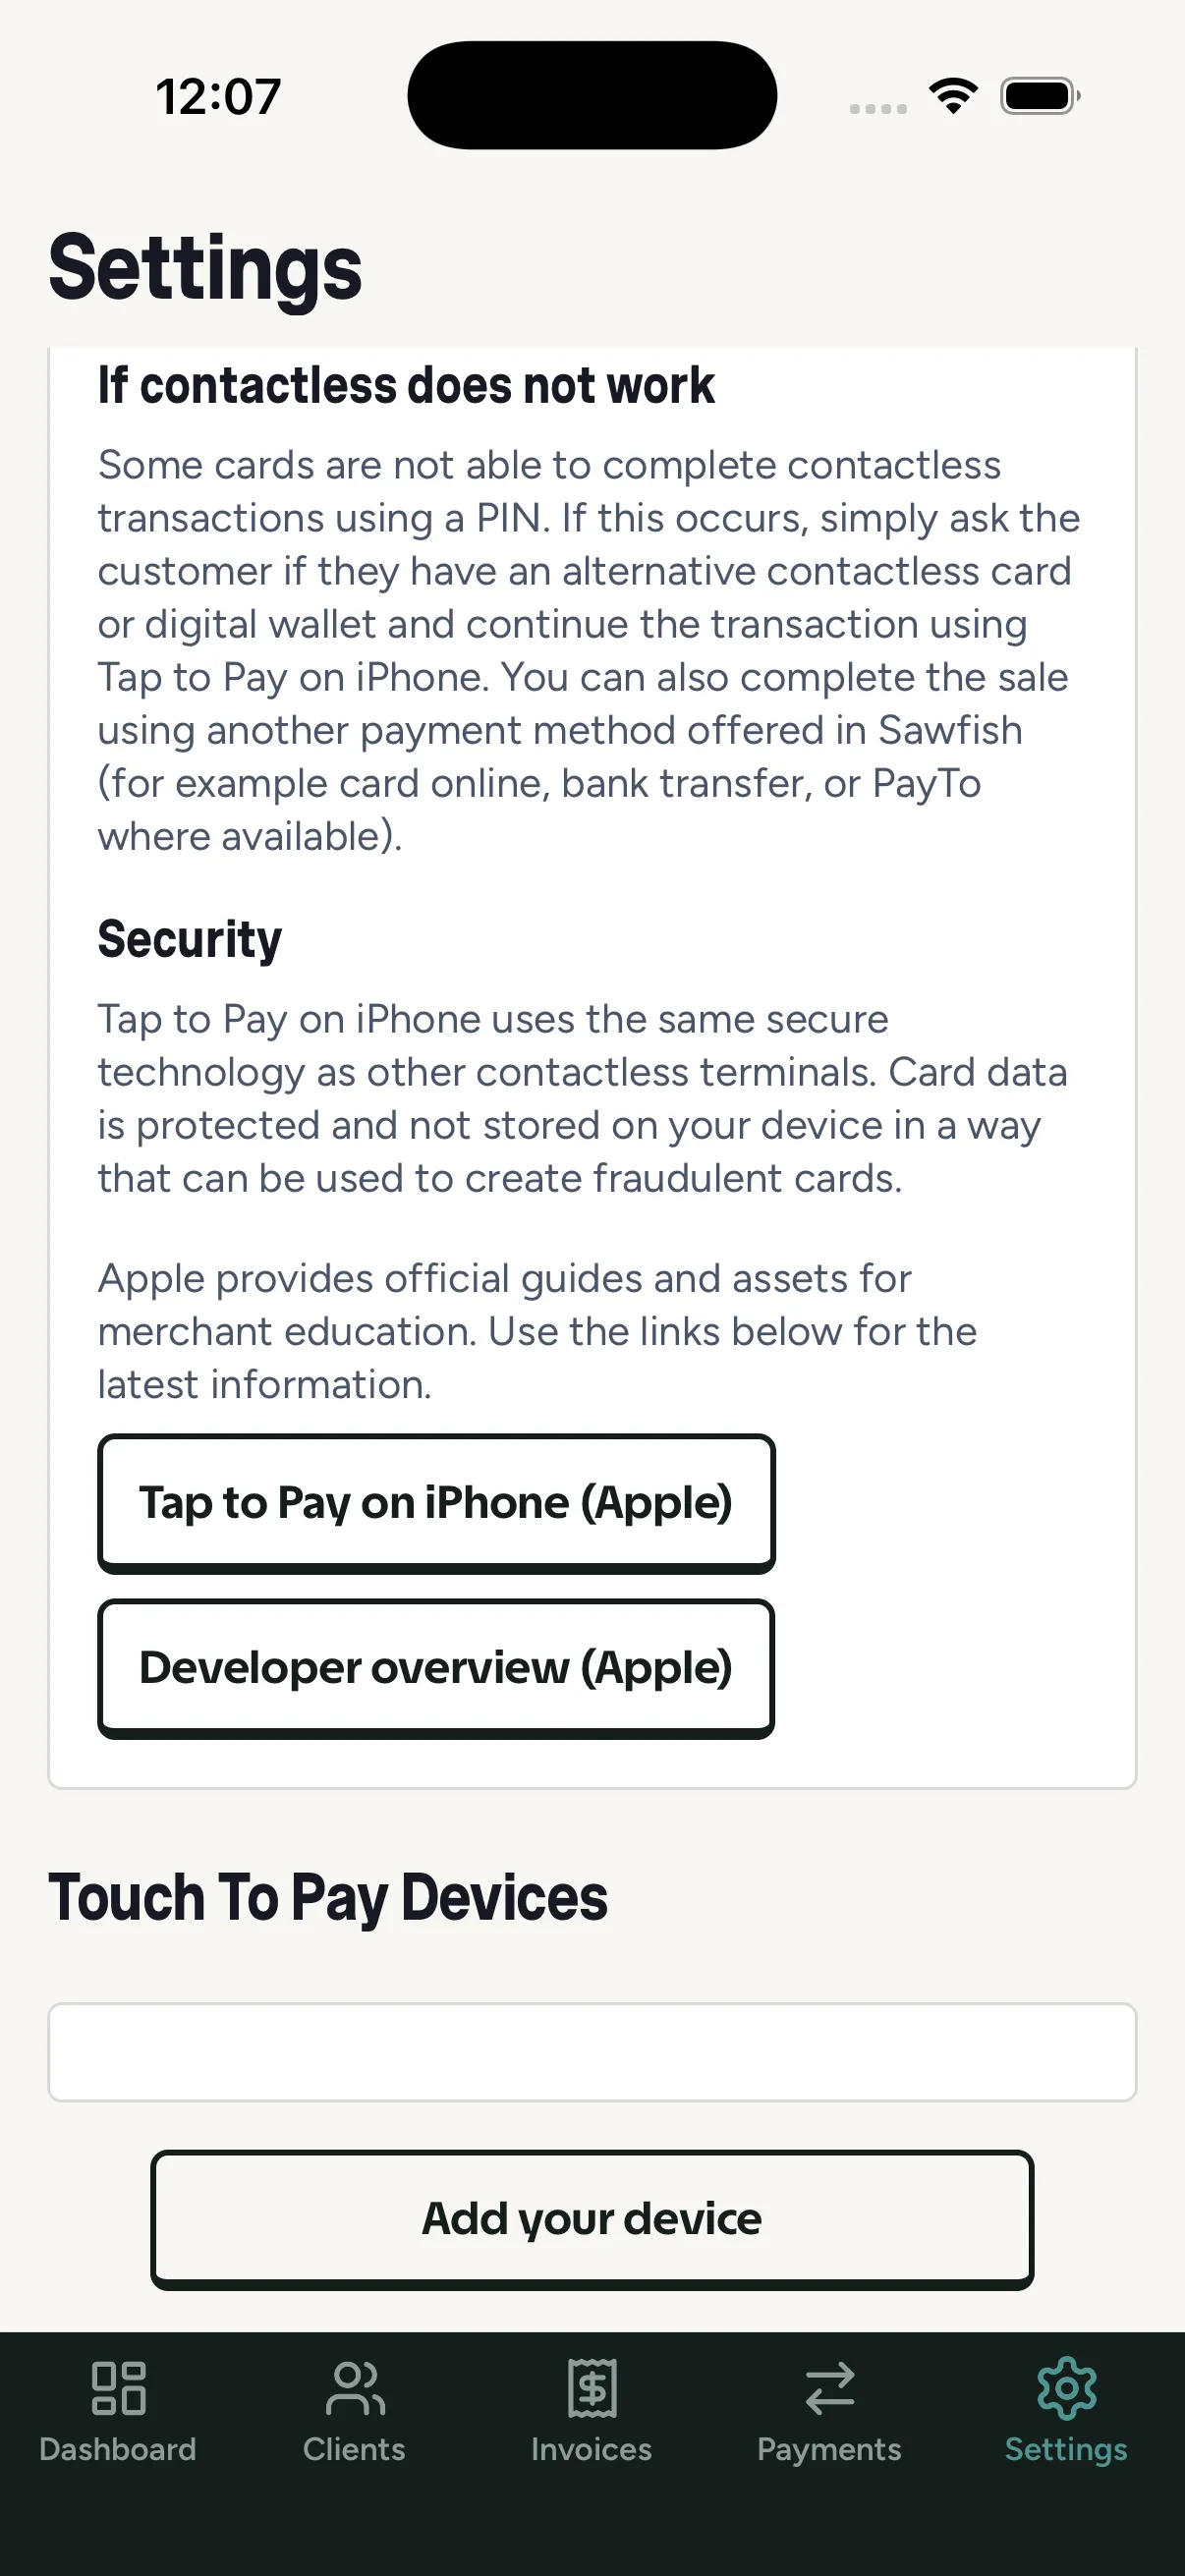
- Under Touch To Pay Devices, tap Add your device and follow the prompts to register this iPhone.
- Manage your registered devices - add more or remove old ones - from the same screen.
Taking a payment
Section titled “Taking a payment”- Start a Tap to Pay payment against the invoice.
- Hold your iPhone steady with the screen facing the customer.
- The customer holds their card flat on the contactless symbol at the top of your iPhone until you see confirmation - Apple Pay and other digital wallets work the same way.
- A receipt is issued on completion, and the invoice is marked paid - synced everywhere like any other payment.
If contactless doesn’t work - some cards can’t complete contactless transactions with a PIN. Ask for an alternative contactless card or digital wallet, or complete the sale with another Sawfish payment method (card online, bank transfer, or PayTo where available).
Push-to-device payments
Section titled “Push-to-device payments”The office can send a payment request straight to a registered device: the person holding the iPhone gets a push notification that opens Tap to Pay directly - even if the app was closed. Great for a counter setup where the till and the phone are different people.
The Point of Sale role
Section titled “The Point of Sale role”For a counter, market stall, or front desk, you don’t have to hand over a full Sawfish login. Invite someone as a Point of Sale Operator (from Settings → Team, like any team member) and their whole world becomes taking payments:
- Mobile app only. The role works exclusively on the phone - signing in on the web shows a notice that the account is for the mobile app, and nothing more.
- Three tabs, nothing else. Operators see Invoices, Keypad, and Settings. No dashboard, no clients, no agreements, no organisation settings - none of your business data beyond what a register needs.
Keypad sales
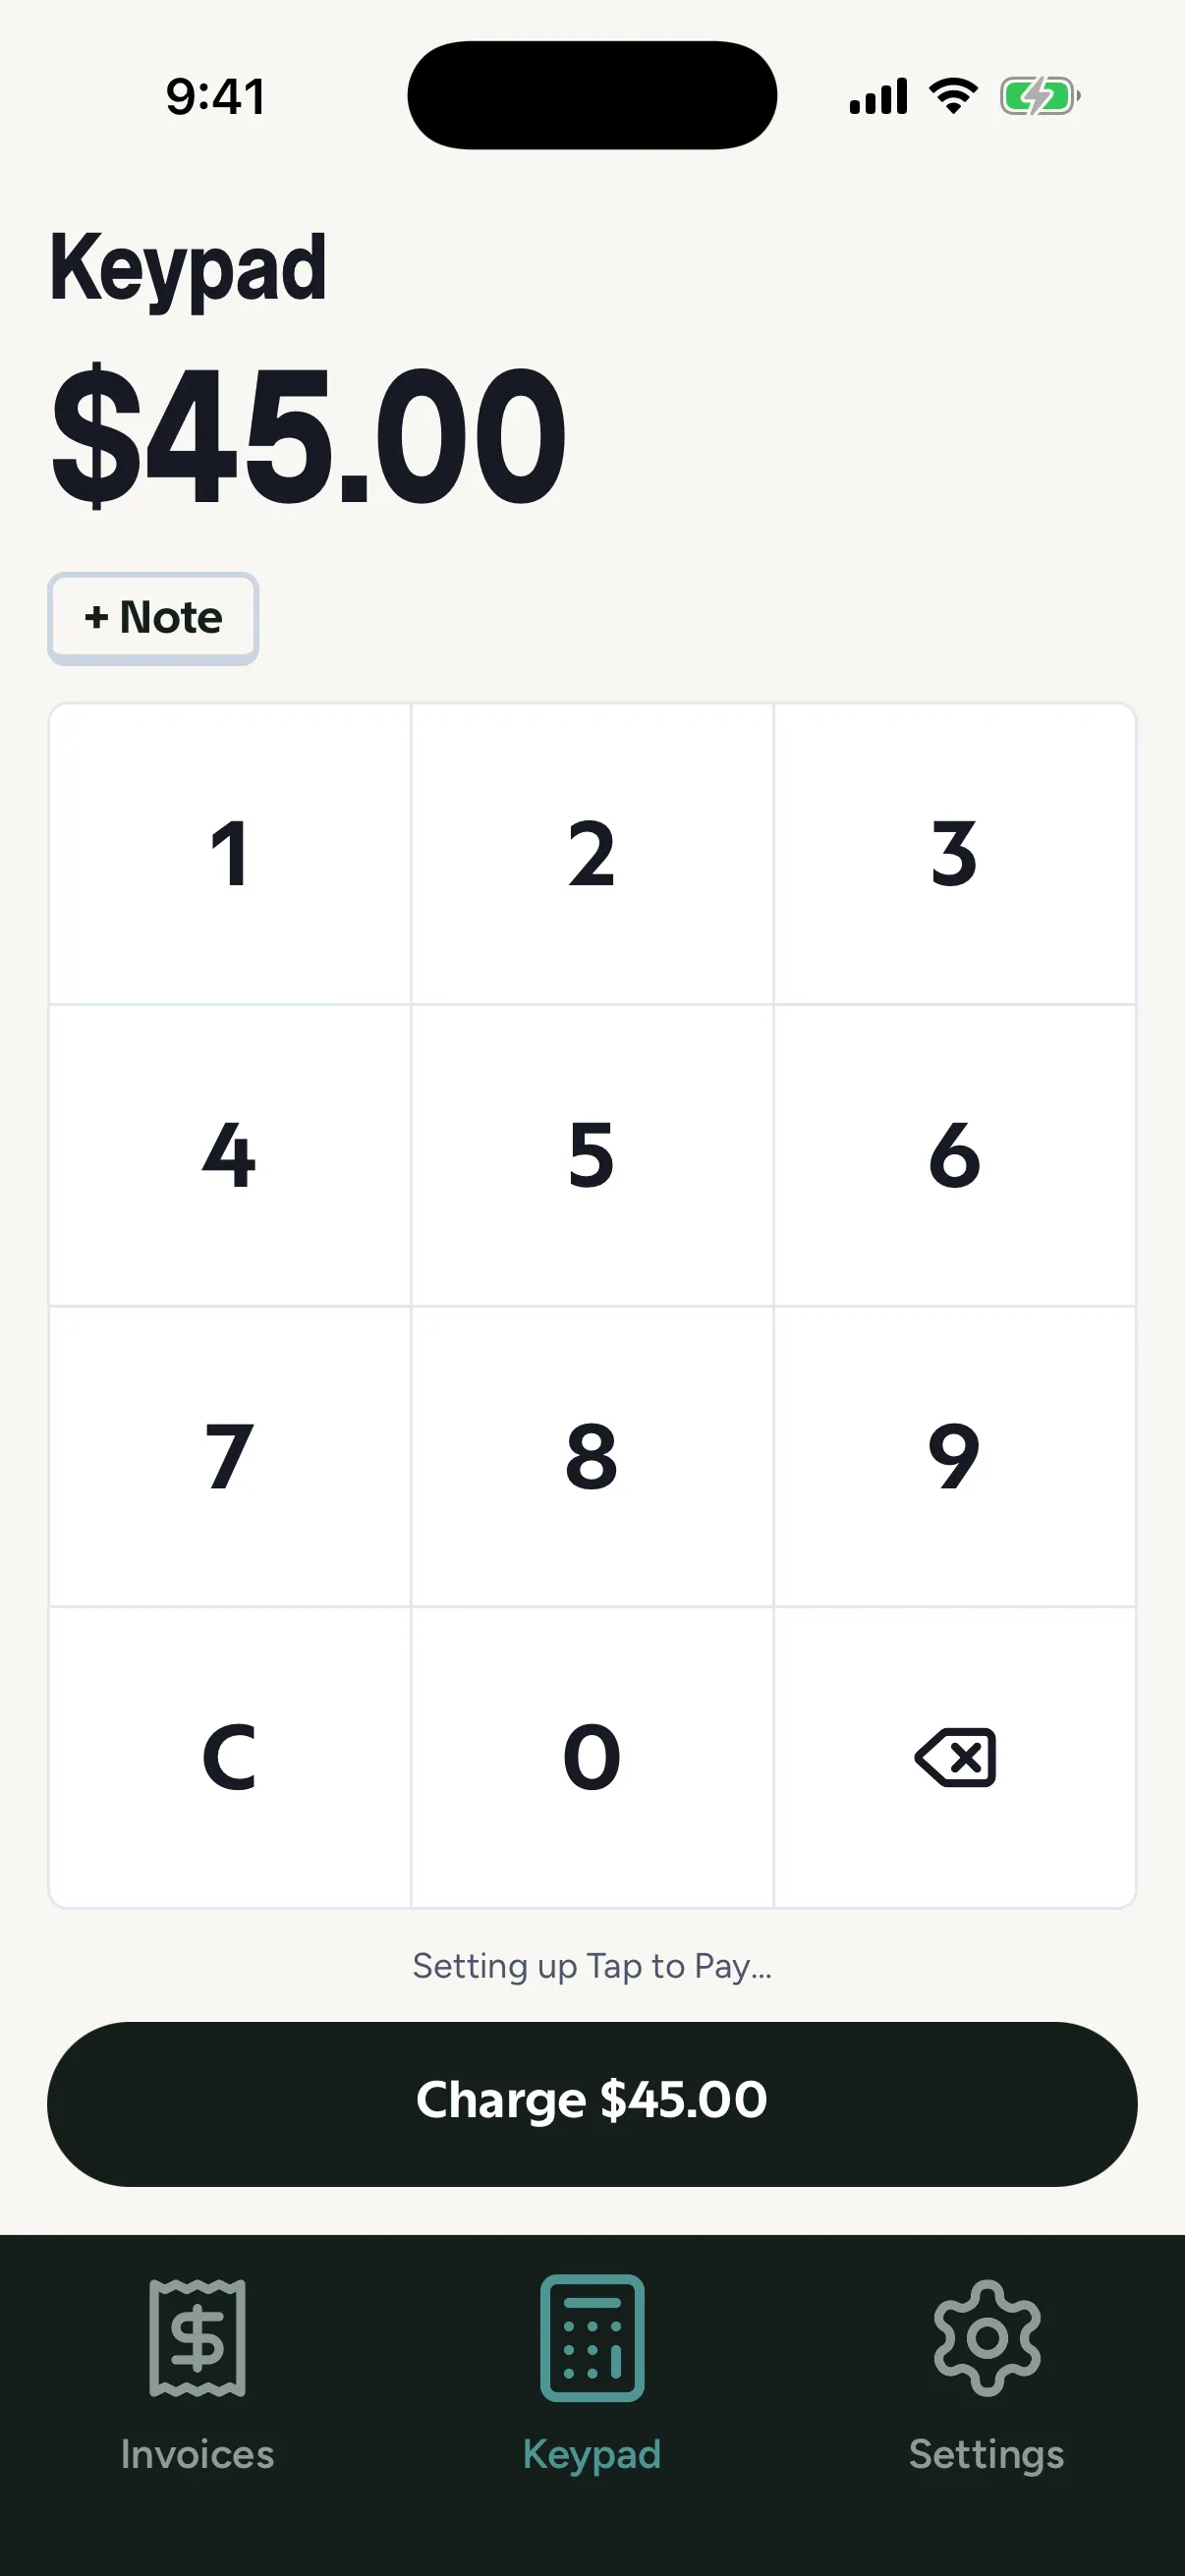
Section titled “Keypad sales”The Keypad is the register. Type the amount, optionally add a note (left blank, the invoice line reads “Retail sale”), and hit Charge - Tap to Pay opens and the customer taps. When the tap is approved, Sawfish creates an already-paid, GST-inclusive invoice behind the sale automatically, numbered from your invoice sequence like any other. Quick-amount buttons above the keypad remember the last three amounts charged on that device.
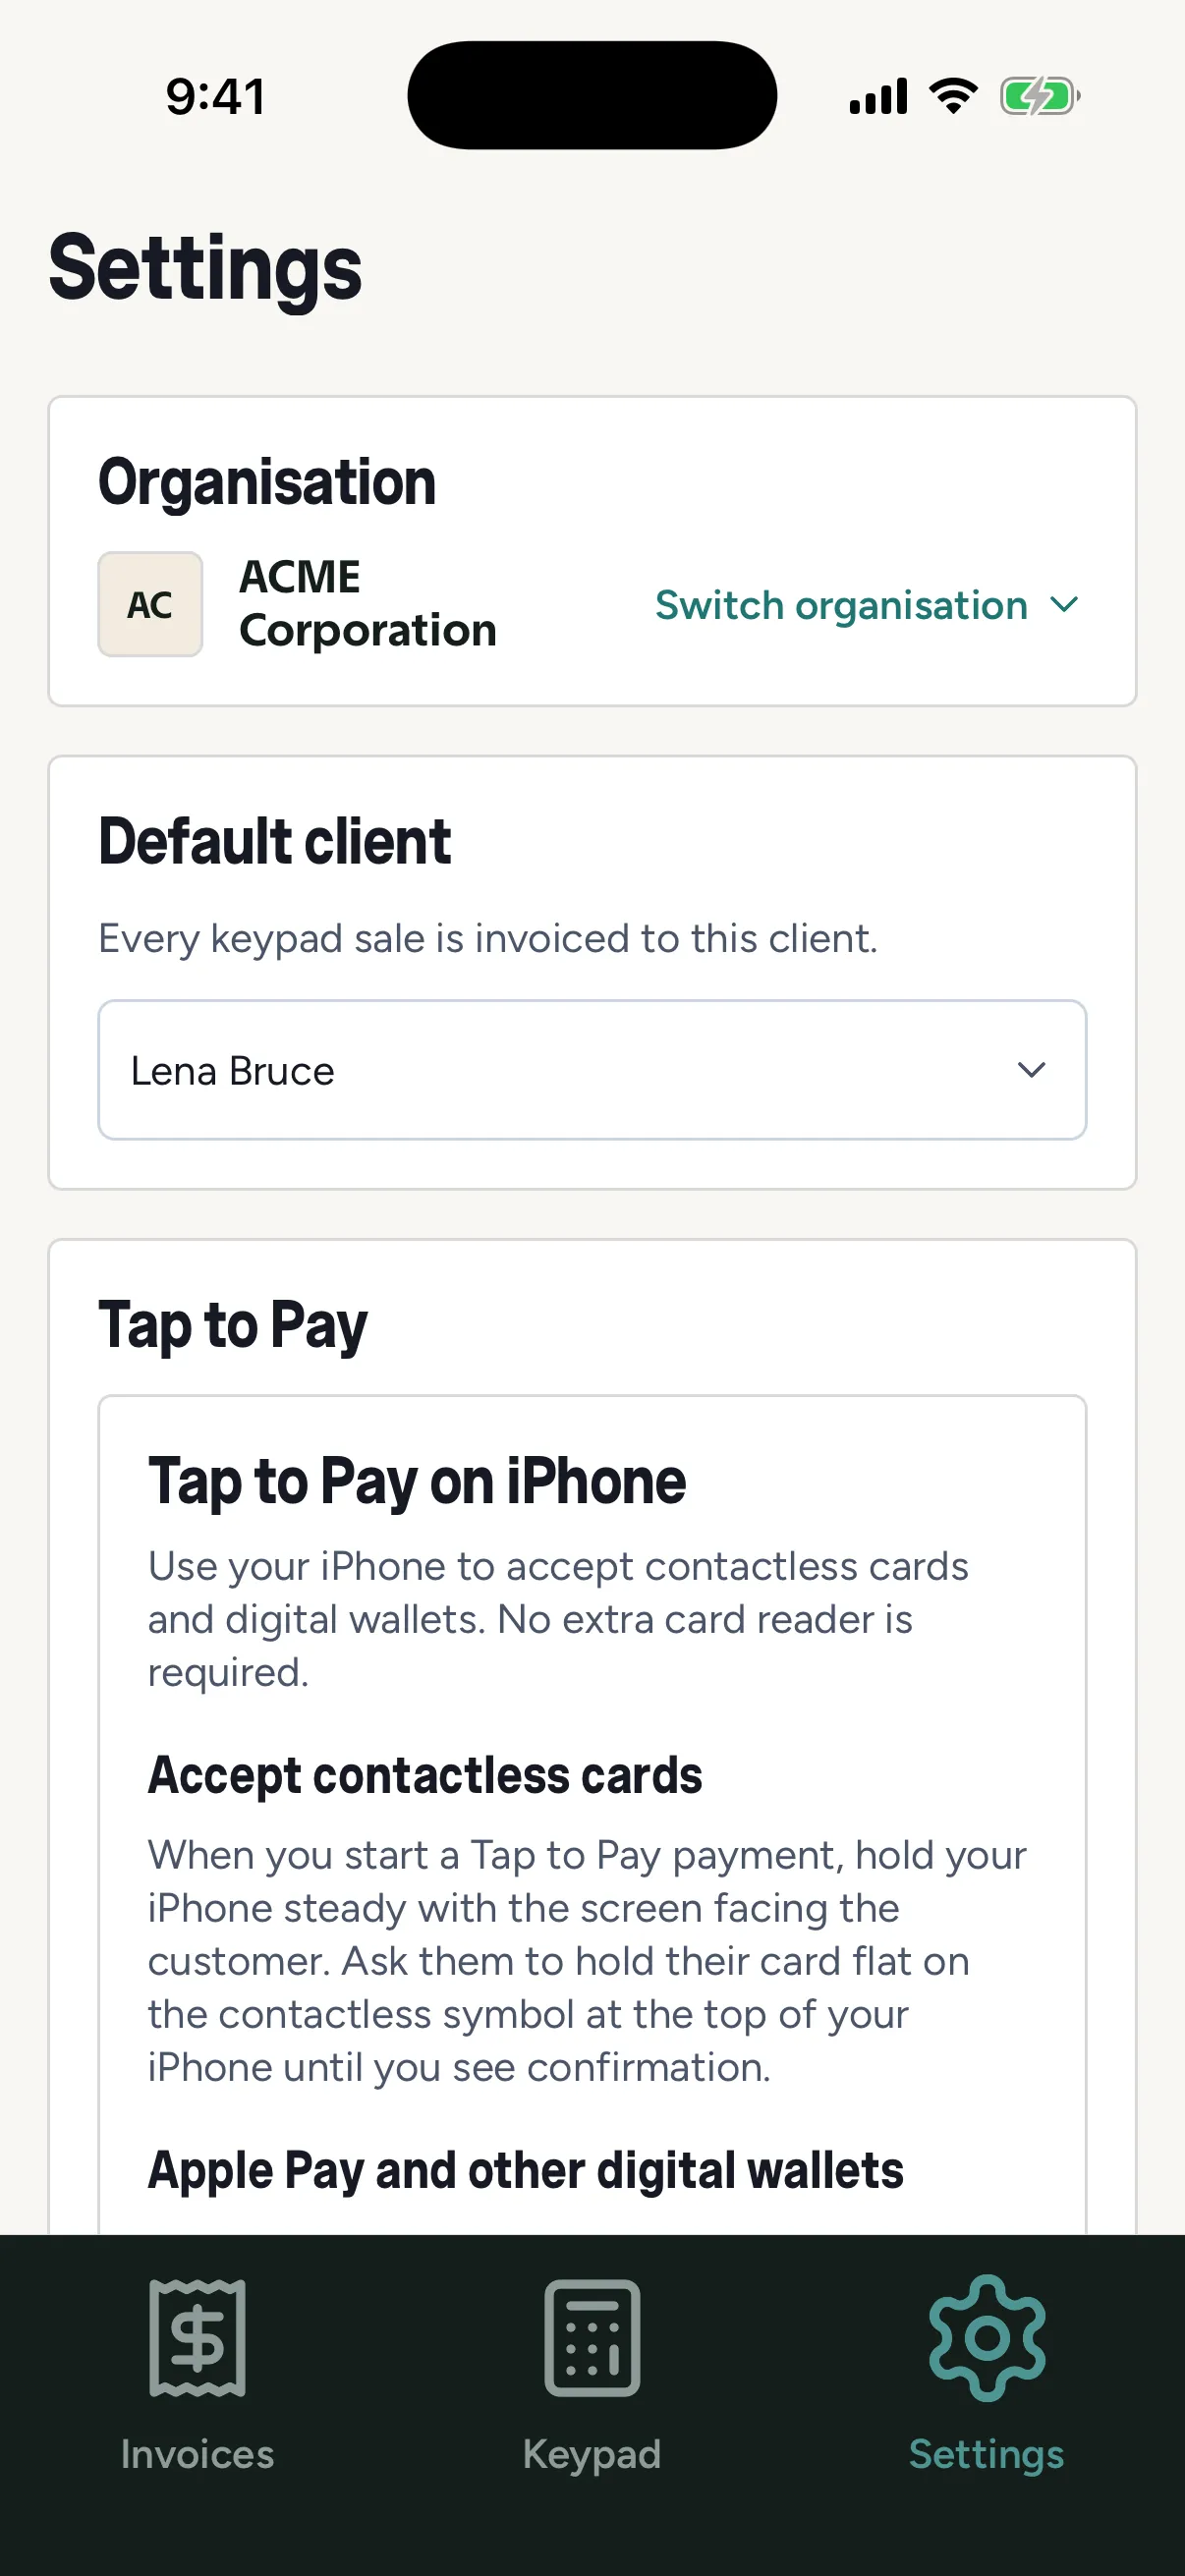
Every keypad sale is invoiced to the operator’s default client - a walk-in or counter-sales client you nominate once in the POS settings, per operator.
The rest of the operator’s app
Section titled “The rest of the operator’s app”- Invoices - the pending and paid invoice lists, so an operator can look up an outstanding invoice and take a Tap to Pay payment against it at the counter.
- Settings - the default client, the organisation switcher (for operators who work across organisations), Tap to Pay device registration, and log out.
Security
Section titled “Security”Tap to Pay on iPhone uses the same secure technology as other contactless terminals - card data is protected and never stored on your device in a way that could be used to create fraudulent cards. The settings screen links to Apple’s official Tap to Pay guides for the latest details.
Where the money shows up
Section titled “Where the money shows up”Tap to Pay takings appear in your Payments list labelled as Windcave Tap to Pay, and pay out with everything else.