

Creating an Agreement
Go to Agreements and click Create Agreement.
What you’ll set up
Section titled “What you’ll set up”- Client and contact - who’s signing. Contact details can be updated during creation, and those updates sync to Xero and MYOB.
- Project name, reference, and description - what the work is; this appears on the agreement the client signs. The description uses the rich-text editor, so you can format it with headings, bold text and lists.
- Schedule - the heart of it. Choose one of three schedule types:
- Limited Agreement - a set number of instalments between a start and end date (e.g. 6 monthly payments),
- Ongoing Agreement - runs until ended, with a validated end date if you set one, or
- Payment Plan - pay off a total amount over time; see below.
- Interval - weekly, fortnightly, monthly, quarterly, half-yearly, or yearly.
- Amounts - the instalment subtotal, GST, and total.
- Terms and Conditions - any terms specific to this agreement. Your client accepts these alongside the Sawfish platform terms when they sign - see Sending and Signing.
- Attachments - supporting files for the client, images or documents. Attachments can be added and removed right up until the agreement is signed; after that the record is locked.
- Payment settings - automatic collection on schedule, or manual payment.
- Expiry - how long the client has to sign before the agreement lapses. Expiry only applies to agreements that have actually been sent - drafts never expire.
Payment Plans
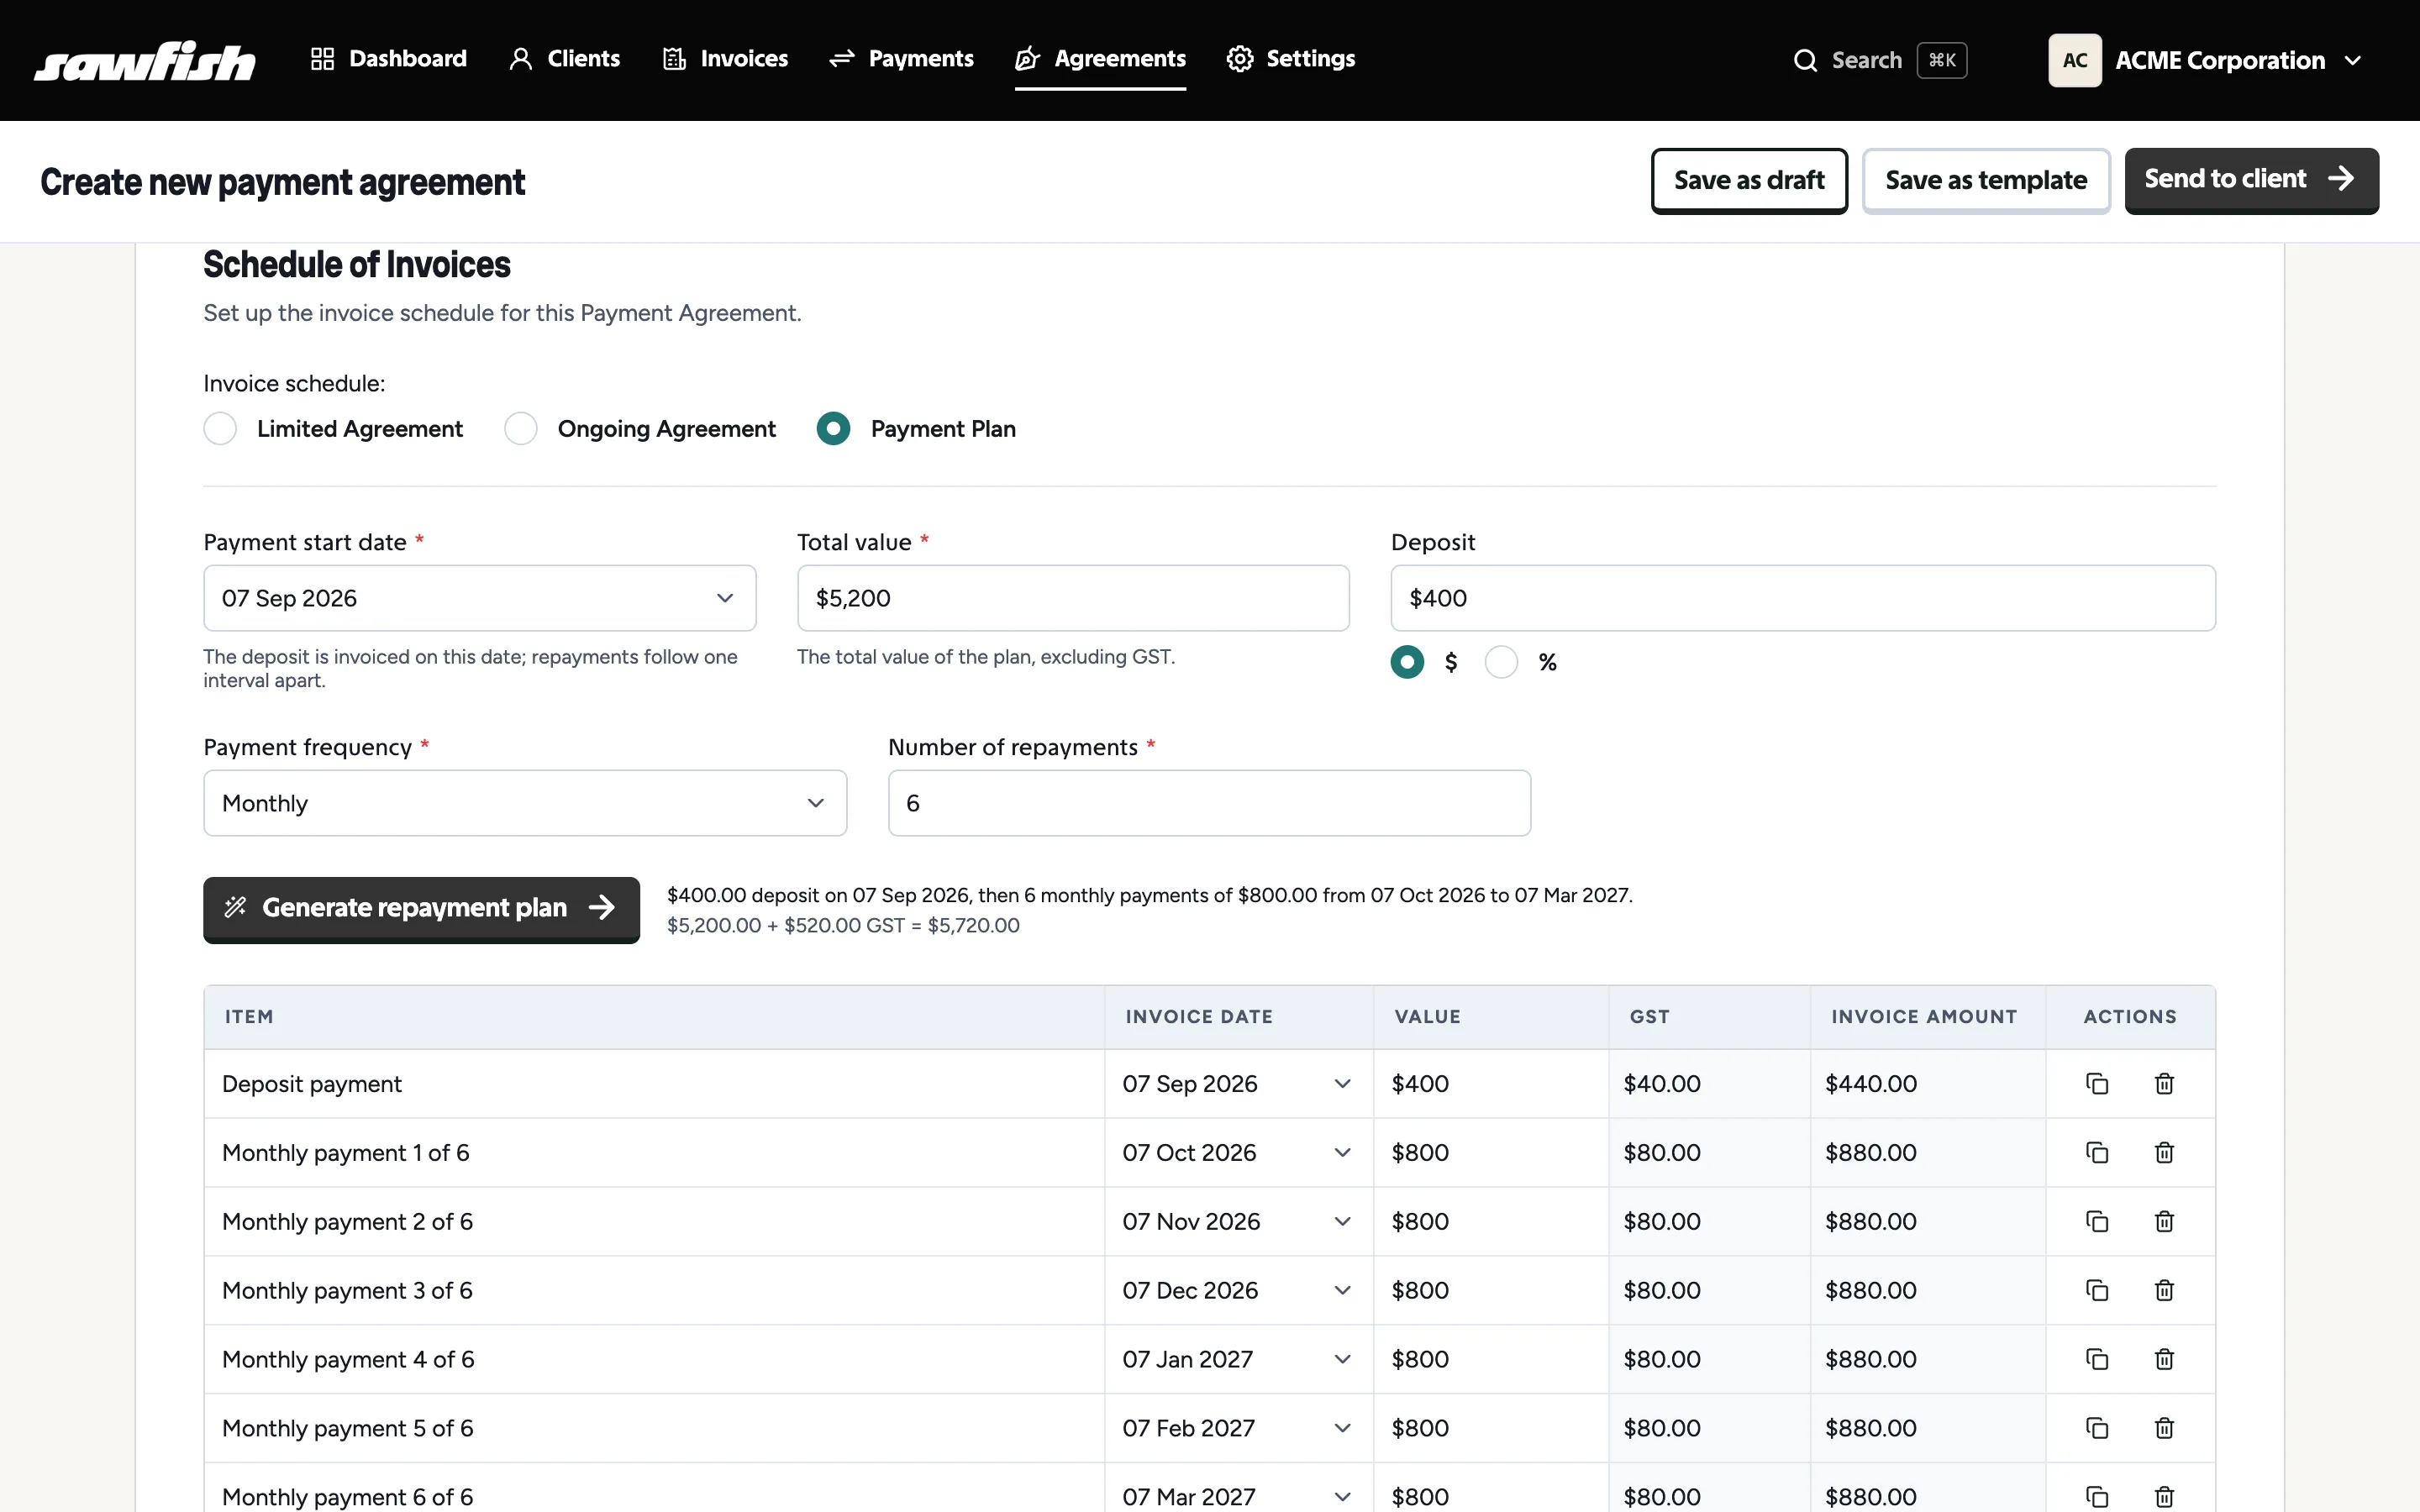
Section titled “Payment Plans”A Payment Plan turns a total owing into a deposit plus a generated repayment schedule - useful for paying off a project or an outstanding balance in instalments. Set:
- Payment start date and Total value - what’s being paid off, from when.
- Deposit - optional, as a dollar amount or a percentage of the total.
- Payment frequency - weekly, fortnightly, monthly, or annually.
- Number of repayments - how many instalments to split the remainder across.
Sawfish generates the schedule for you - the deposit (if any) up front, then equal repayments at your chosen frequency - and shows every payment with its date before you send anything. GST comes out to exactly 10% of the plan total, with any rounding absorbed in the final instalment.
Preview with Client View
Section titled “Preview with Client View”Before (or after) sending, use Client View to see the agreement exactly as your customer will - formatting, branding, terms, and schedule. It’s available from the agreement screen at any time, not just before sending. If the start page shows the default Sawfish illustration, upload your own brand image to replace it.