

Connecting Your Accounting Software
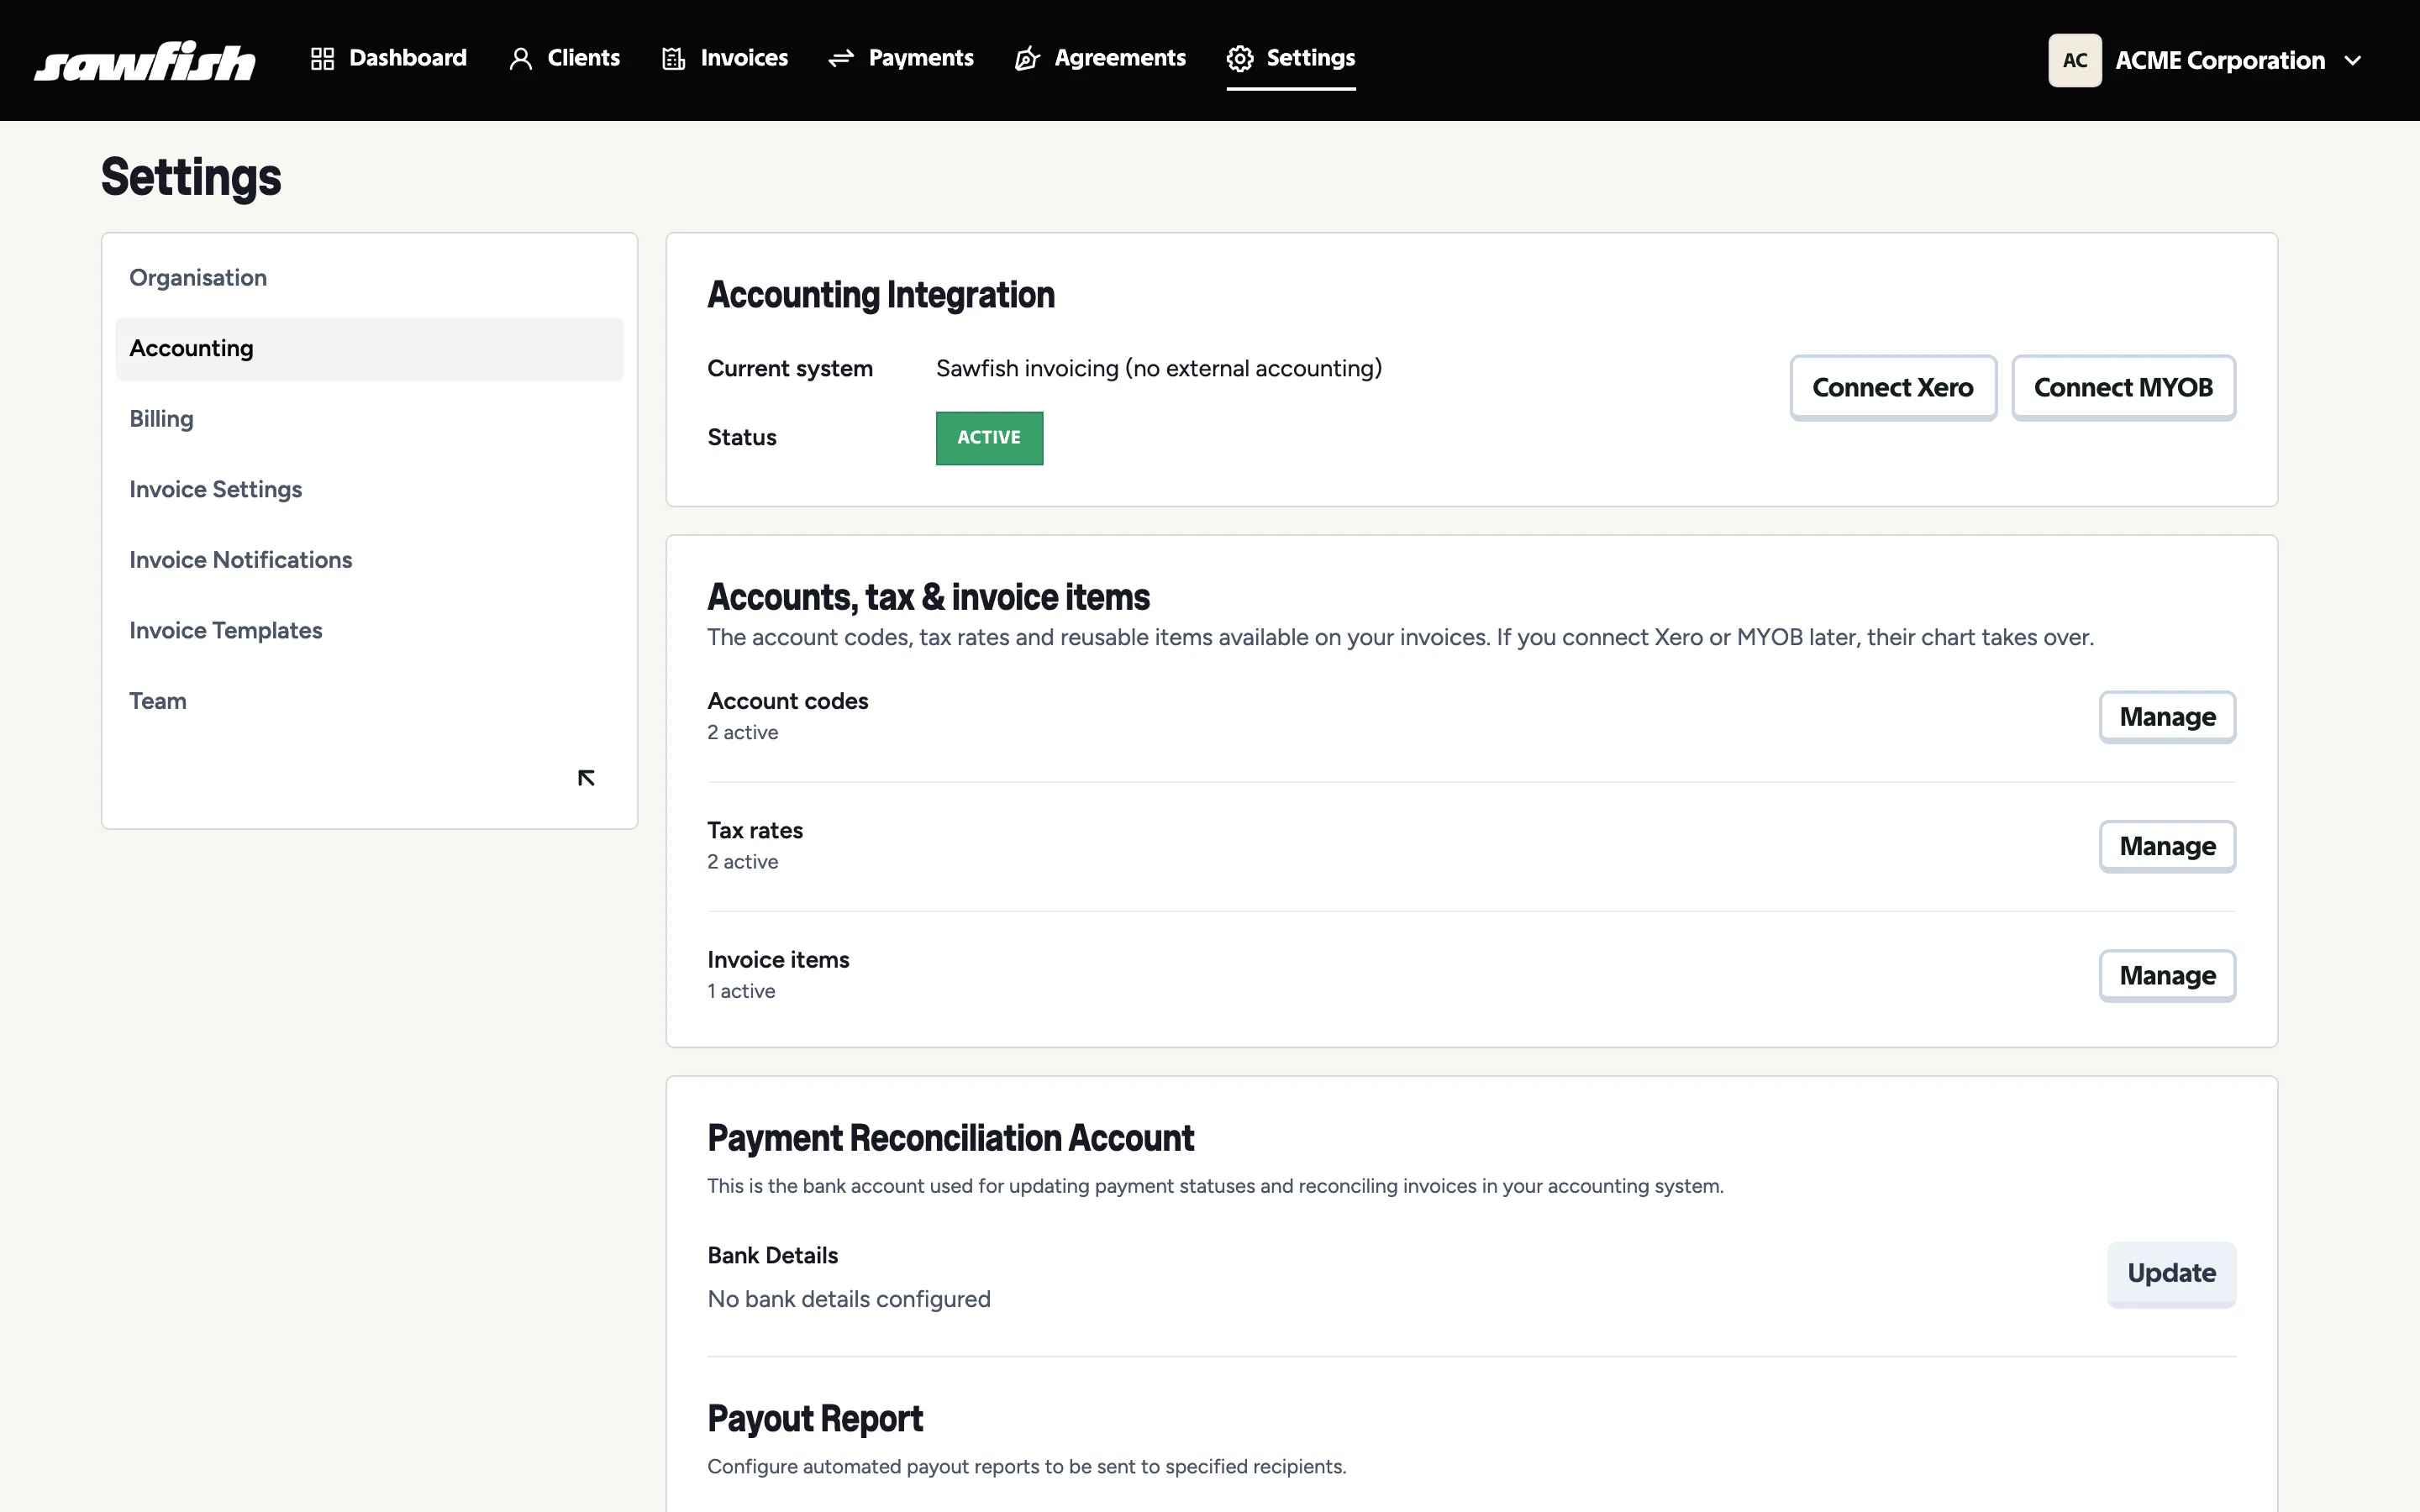
Sawfish works three ways: connected to Xero, connected to MYOB, or standalone using Sawfish invoicing. You choose during onboarding, and you can connect or change later from Settings → Accounting.
Connecting Xero or MYOB
Section titled “Connecting Xero or MYOB”- Go to Settings → Accounting.
- Choose Connect Xero or Connect MYOB.
- You’re taken to your accounting provider to sign in and authorise Sawfish - for Xero, that’s the familiar Xero login:
- Approve the connection, choose the organisation to link, and you’re returned to Sawfish.
- Sawfish imports your chart of accounts, tax rates, items, and clients.
Once connected:
- Invoices sync both ways. Raise an invoice in Sawfish, Xero, or MYOB and it appears everywhere. Approvals and edits flow through too.
- Payments reconcile automatically. When a customer pays through Sawfish, the payment is recorded against the invoice in your accounting system.
- Clients stay in sync. Contact detail updates flow through to Xero and MYOB.
- Your chart takes over. Account codes, tax rates, and items come from your accounting system instead of Sawfish’s own.
The payment reconciliation account
Section titled “The payment reconciliation account”On the same Accounting settings page, set your Payment Reconciliation Account - the bank account Sawfish uses when recording payments and reconciling invoices in your accounting system. Click Update under Bank Details and enter the account:
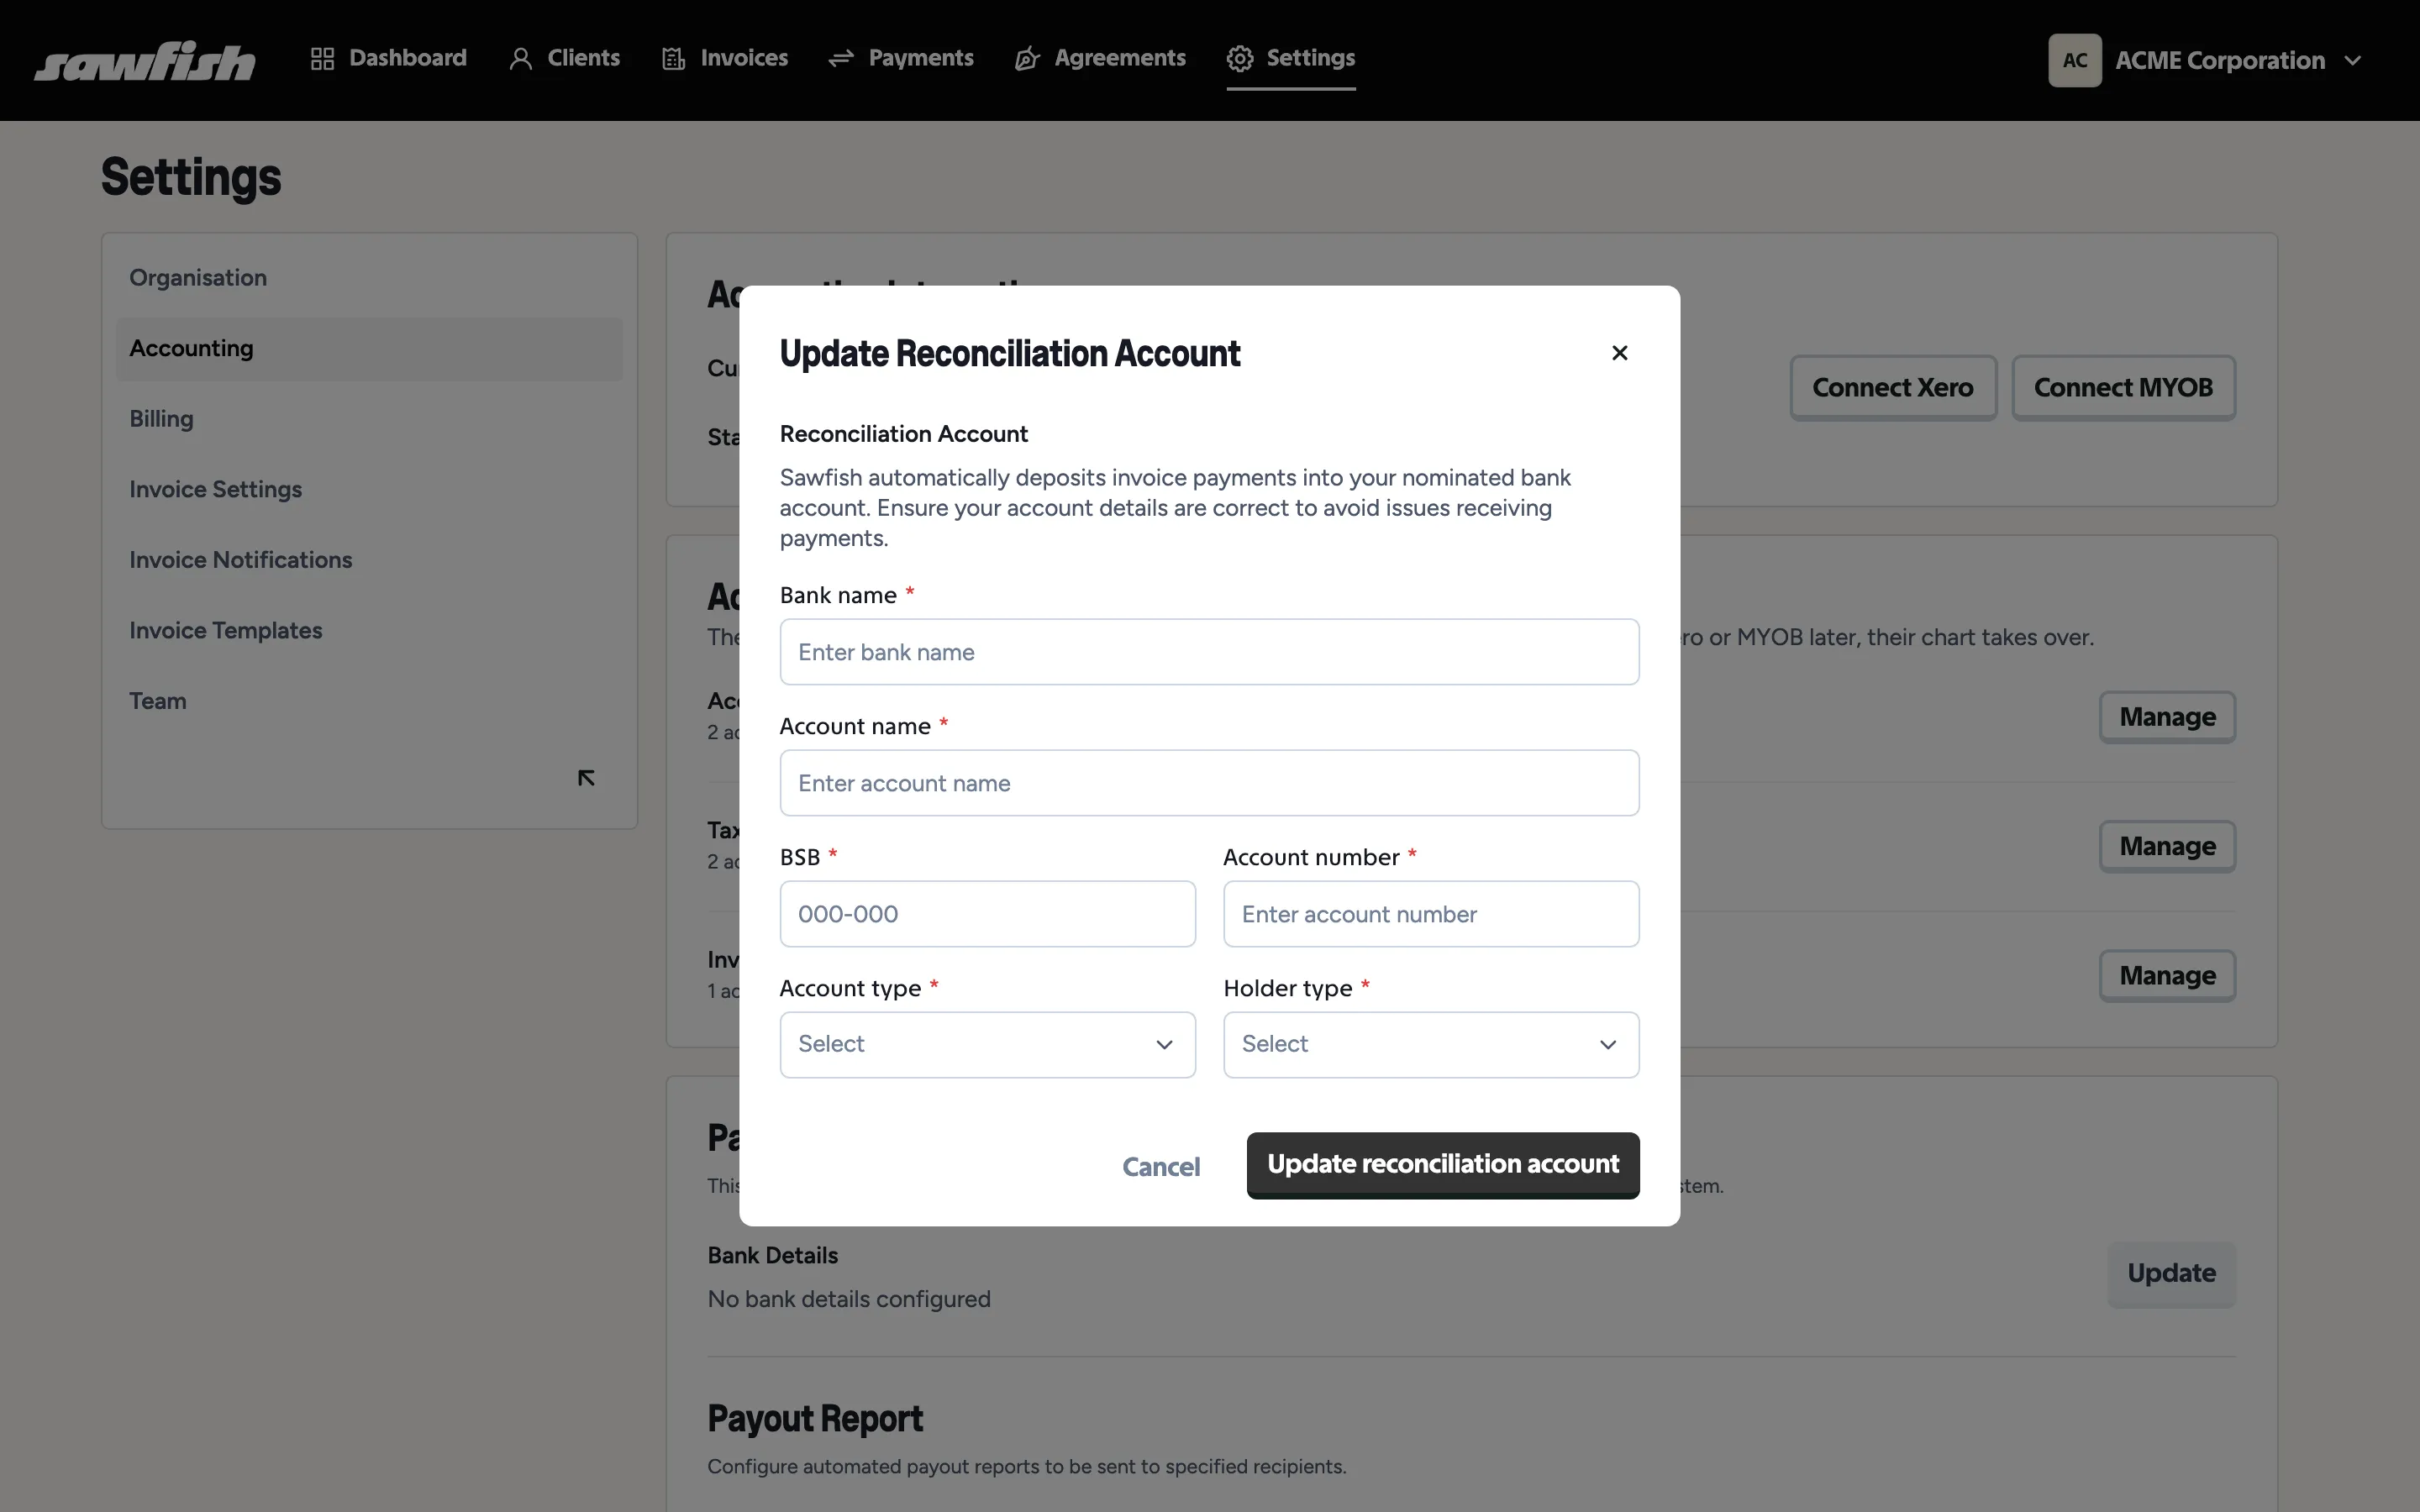
Without it, payments can’t be written back.
Running standalone (Sawfish invoicing)
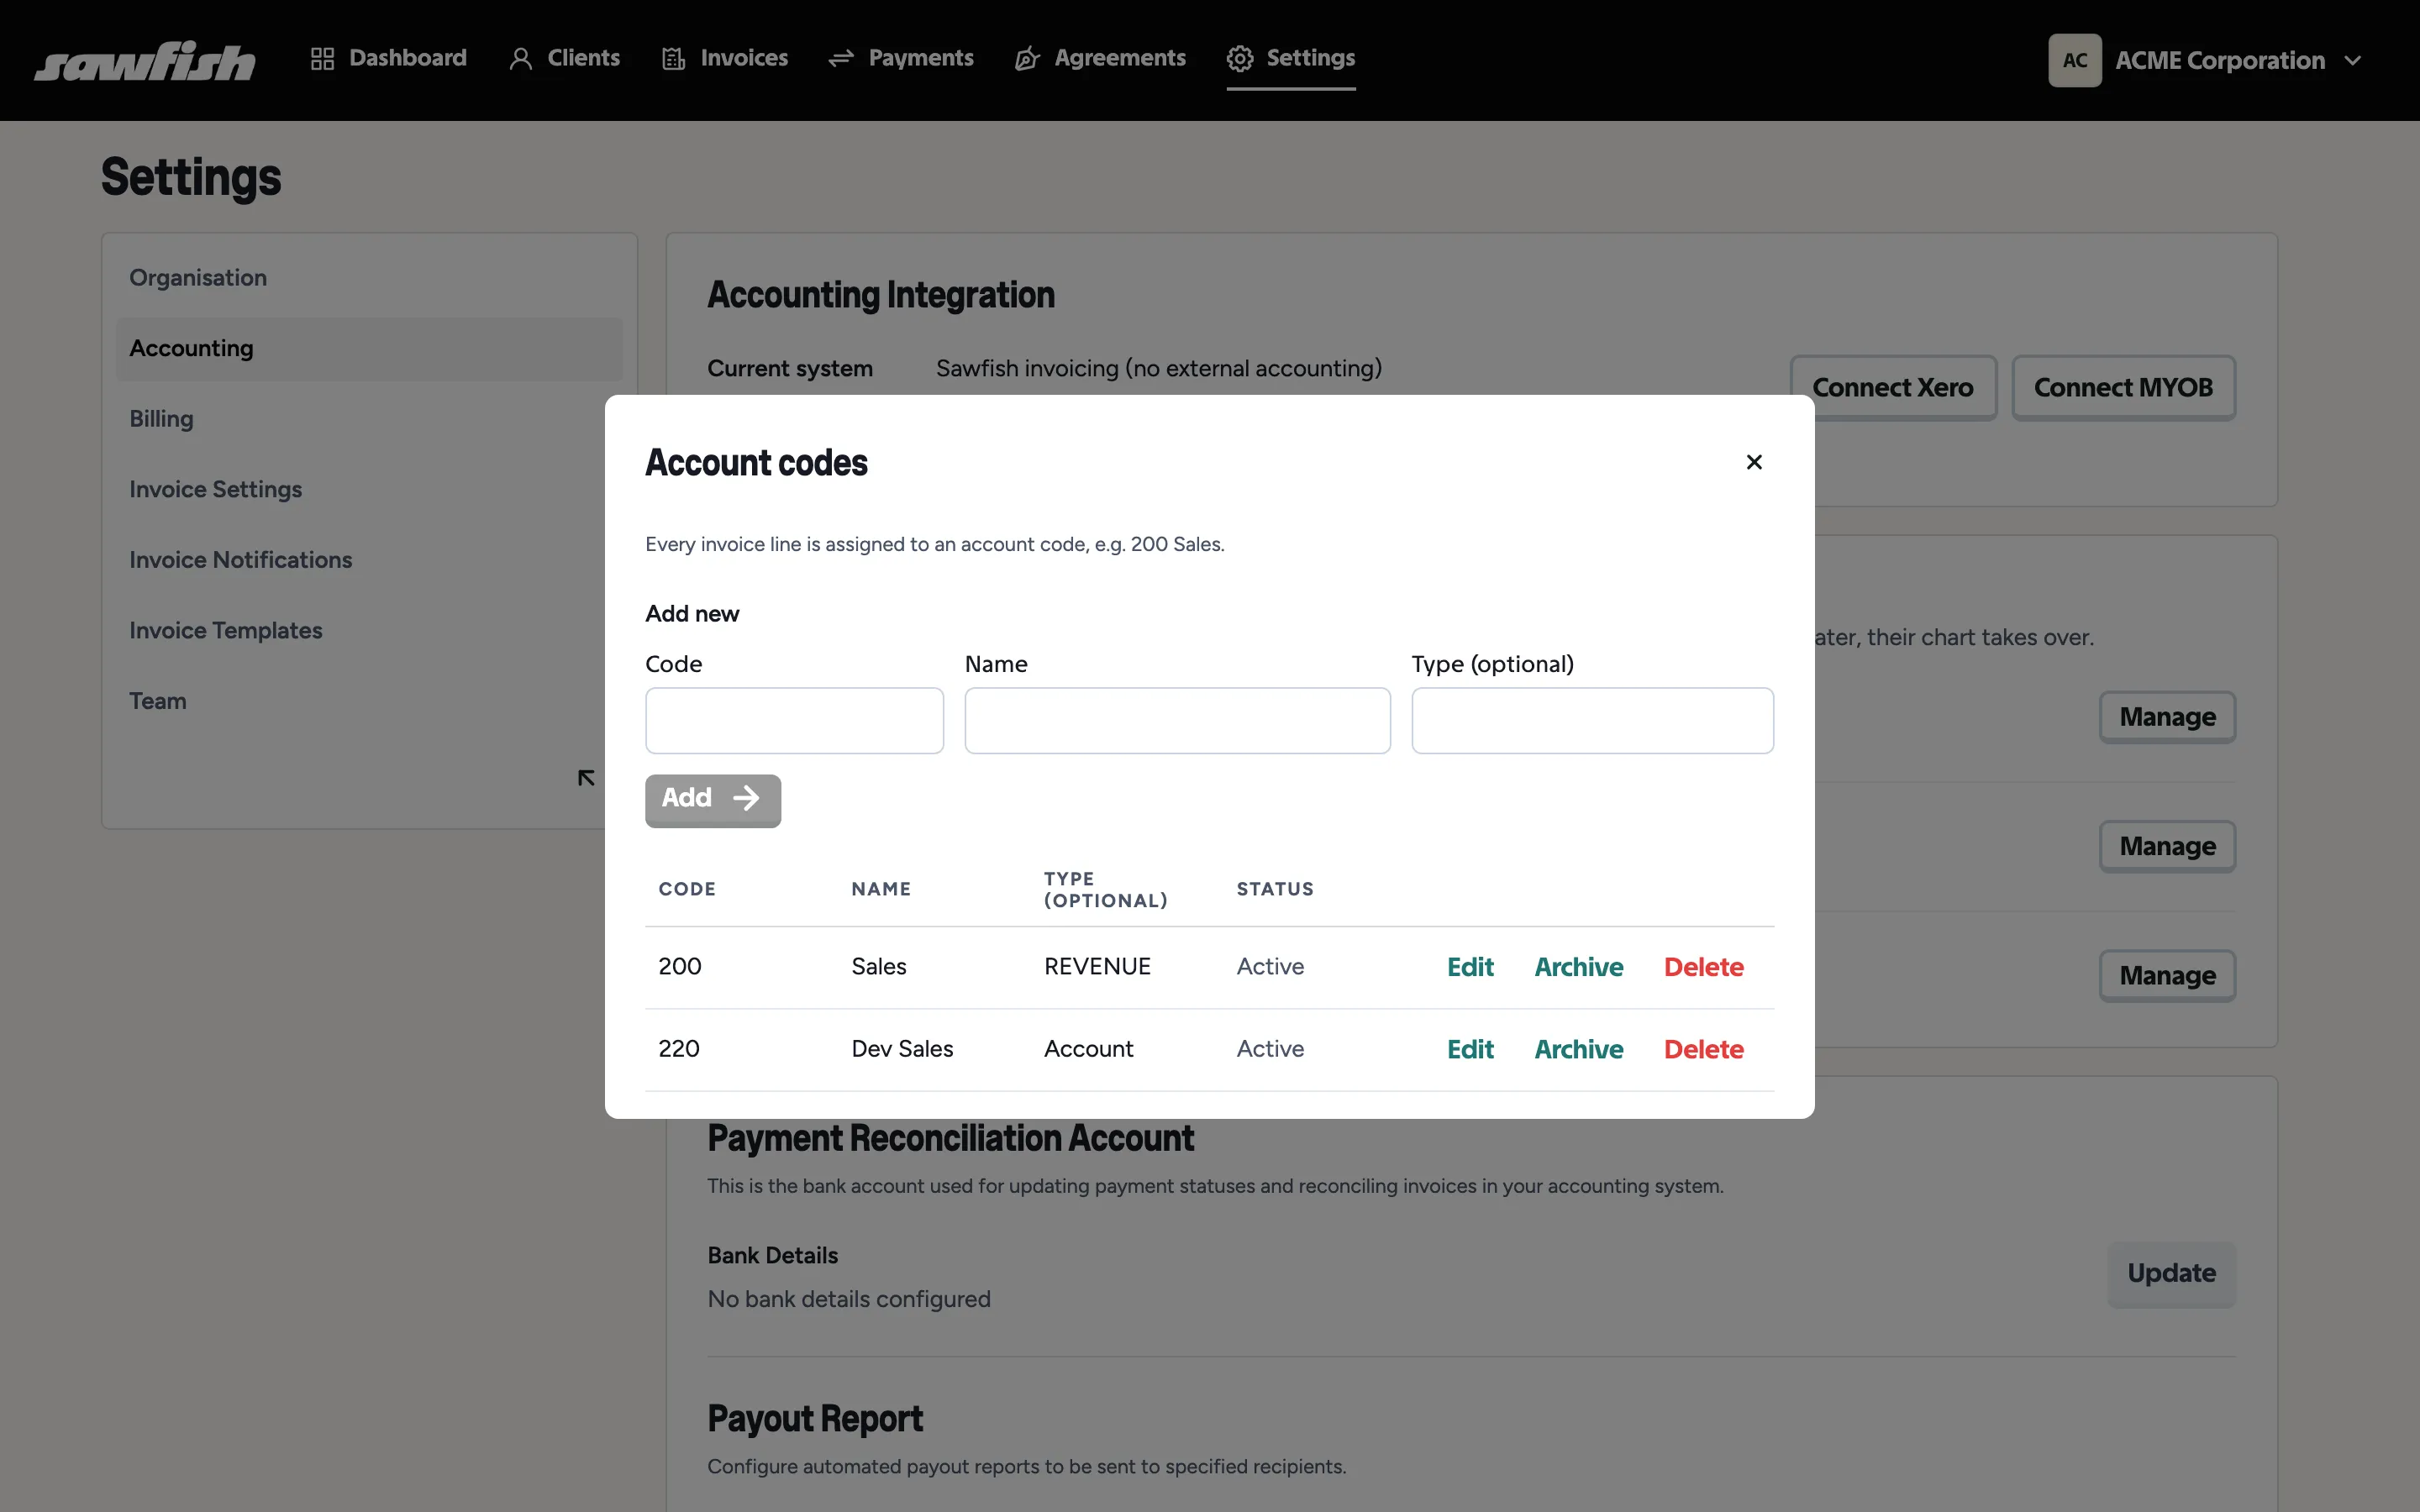
Section titled “Running standalone (Sawfish invoicing)”Skip the connection and Sawfish manages its own chart. Under Accounts, tax & invoice items, each Manage button opens the matching editor:
- Account codes - every invoice line is assigned to an account code (e.g.
200 Sales); add, edit, or archive them. - Tax rates - GST is set up for you.
- Invoice items - reusable line items that prefill descriptions and prices when invoicing.
If you connect Xero or MYOB later, their chart of accounts takes over from the built-in one.
Payout report
Section titled “Payout report”The Accounting page is also where the Payout Report lives - automated payout summaries to the recipients you nominate. See Payouts and your wallet.
Next step
Section titled “Next step”With accounting sorted, run through the setup checklist.