

Creating an Invoice
Go to Invoices and click Create Invoice.
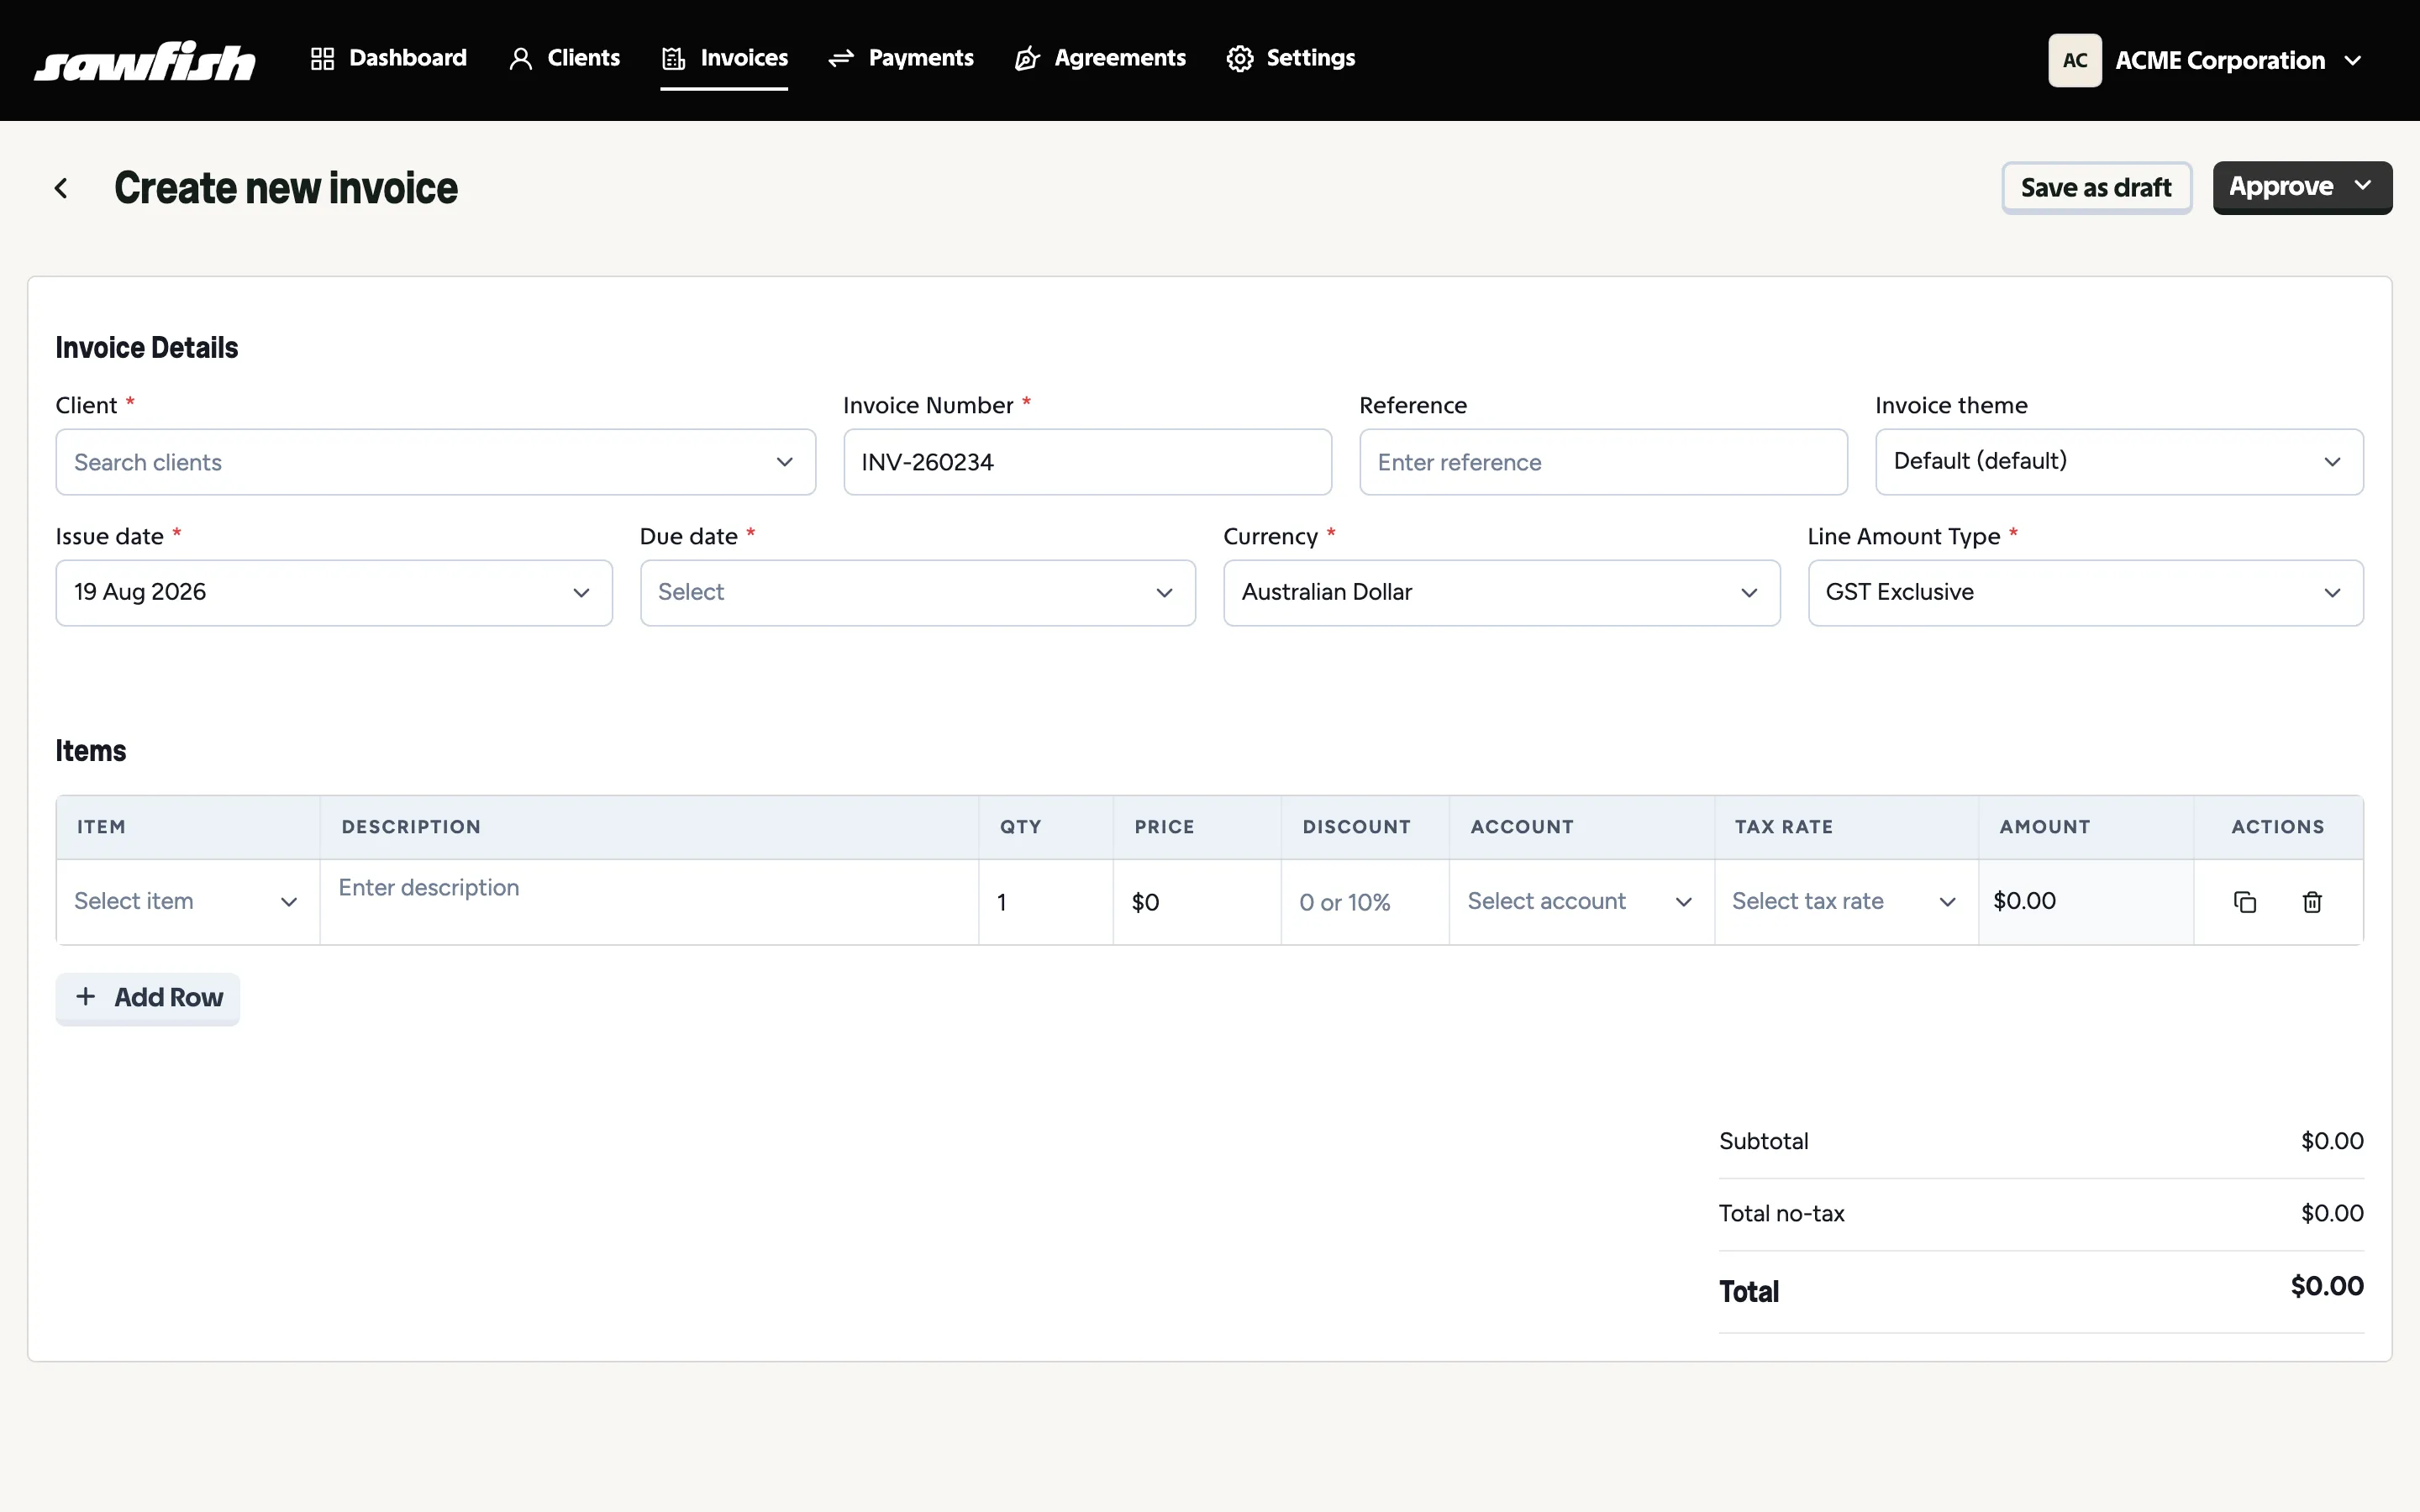
Invoice details
Section titled “Invoice details”- Client - pick from your client list. The due date fills in automatically from the client’s payment terms (you can override it).
- Invoice number - generated from your invoice prefix and next-number sequence (Settings → Invoice Settings), or numbered by your accounting provider if you’ve enabled provider numbering.
- Reference - a free-text reference that appears on the invoice, useful for POs and job numbers.
- Invoice theme - which template this invoice uses.
- Line Amount Type - whether your line prices are GST exclusive or inclusive.
Line items
Section titled “Line items”Each row has an item, description, quantity, price, discount, account code, and tax rate.
- Items - pick a reusable item to prefill the row, or type directly.
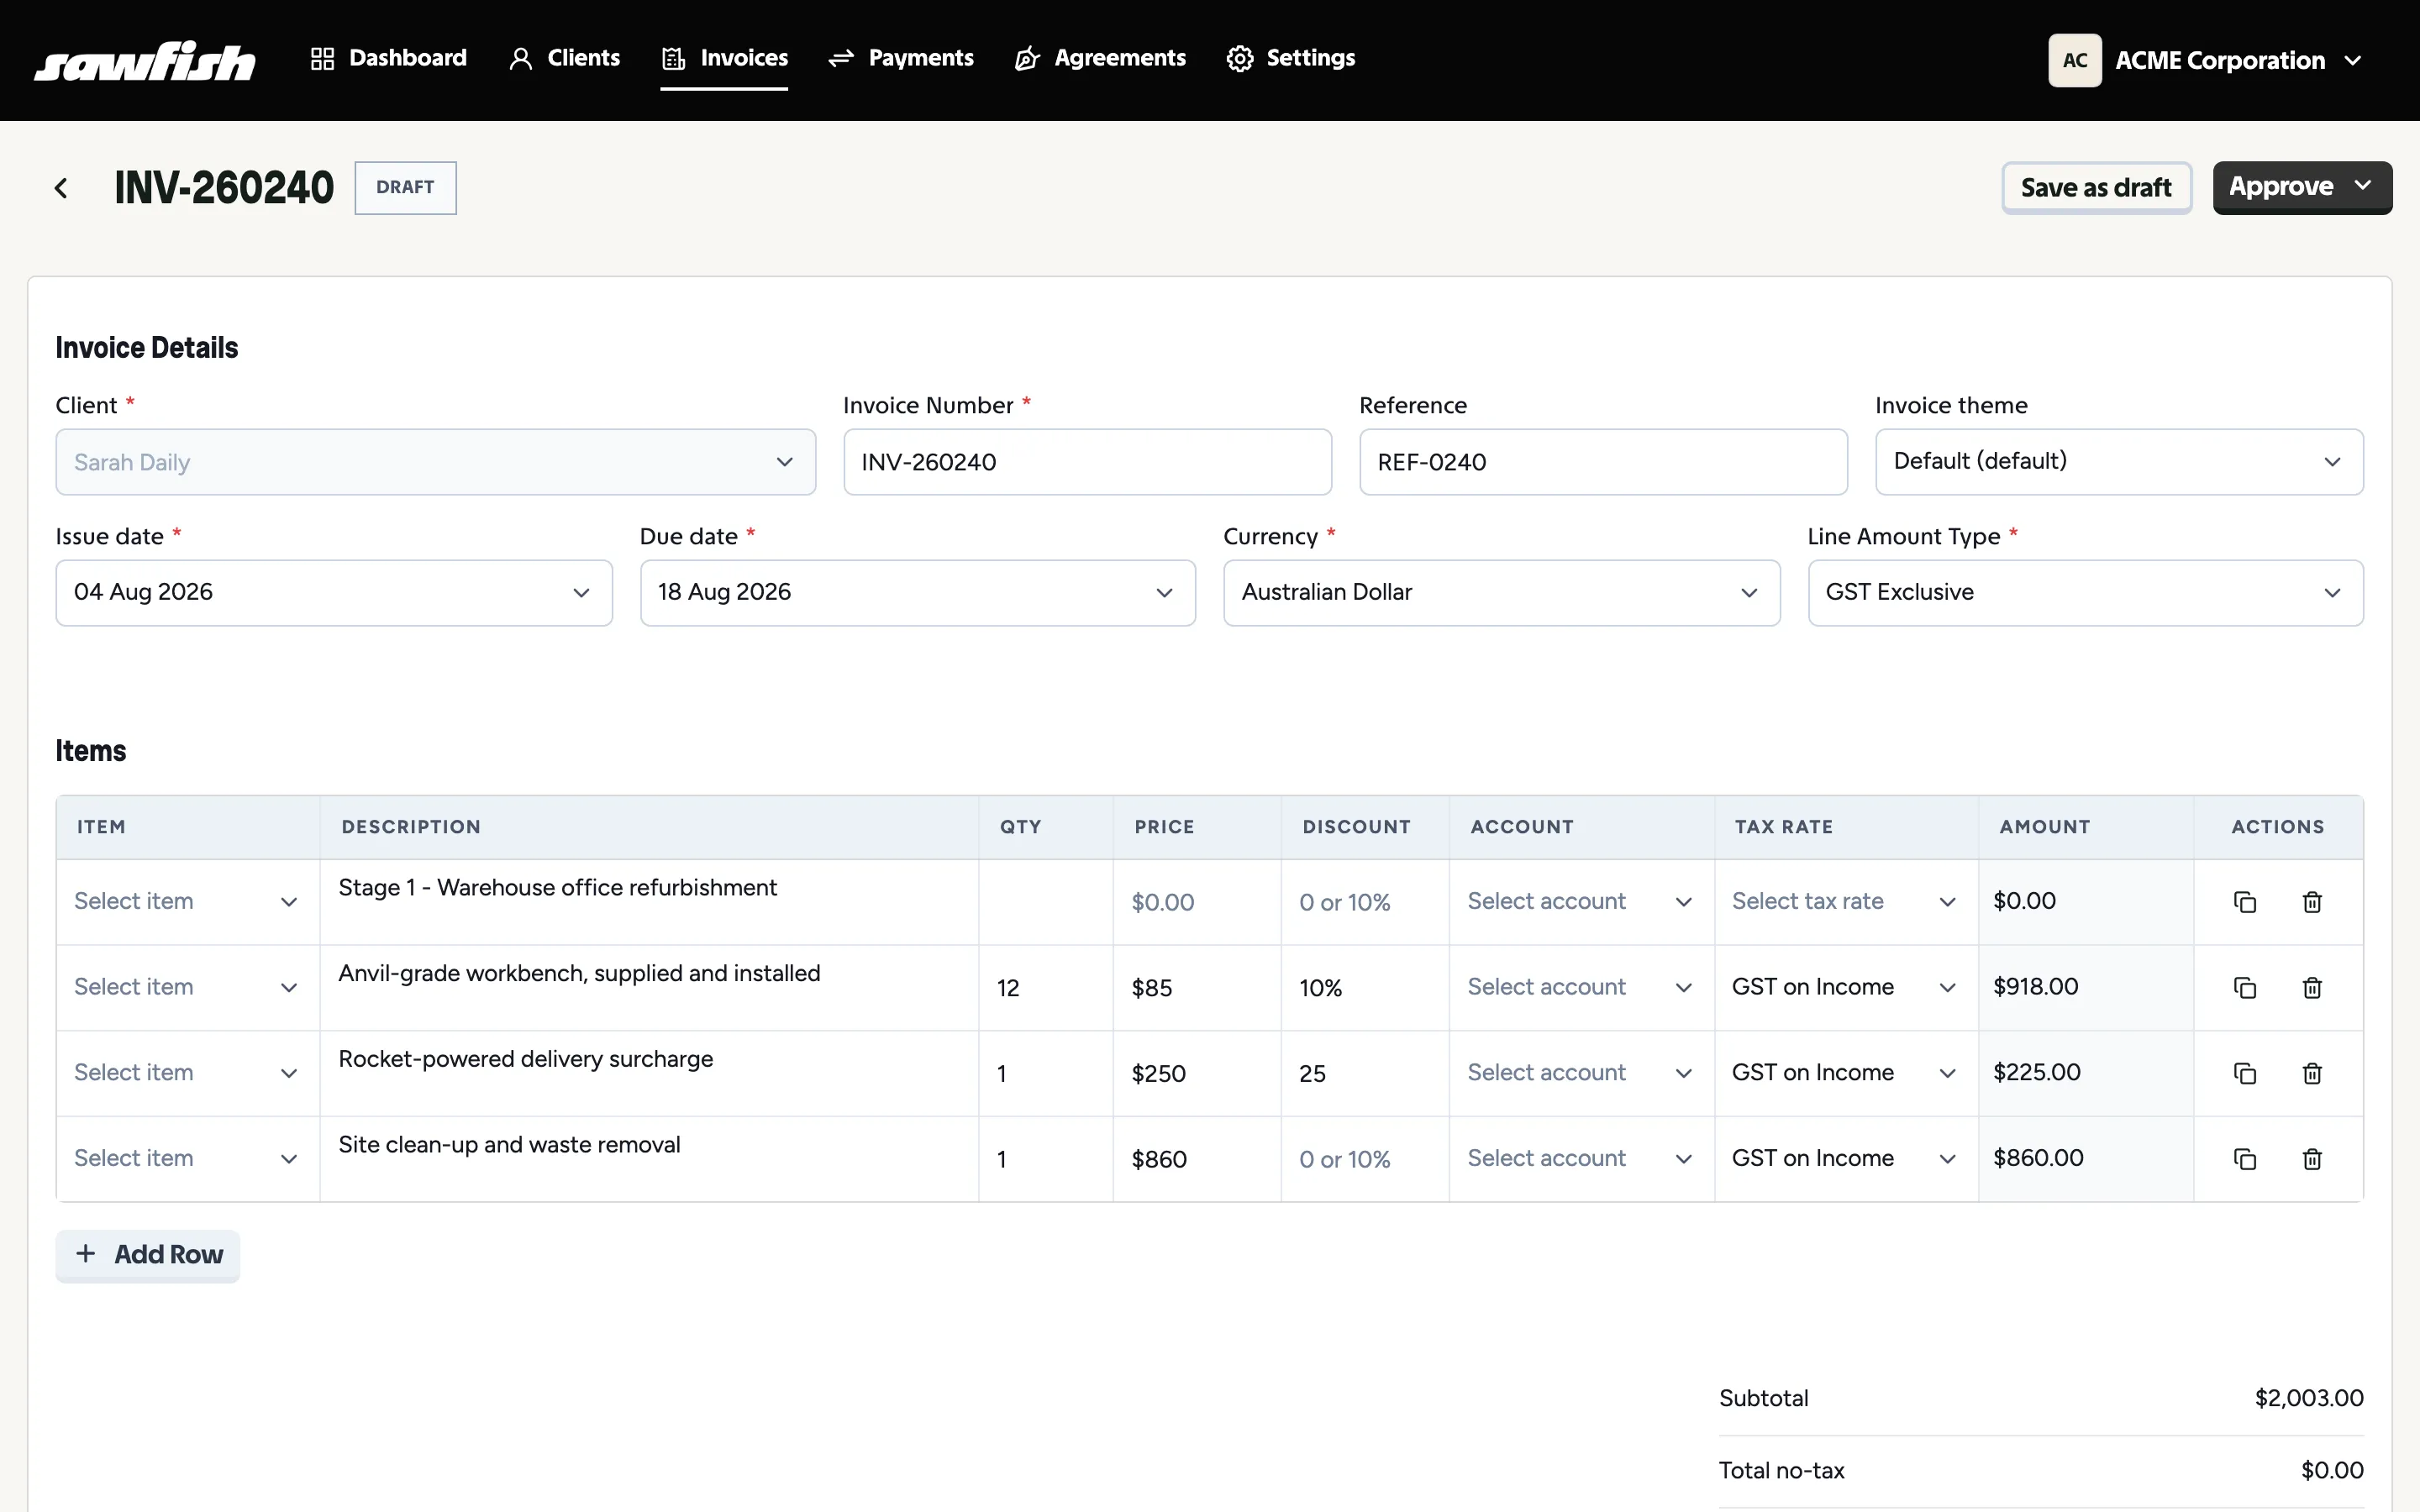
- Descriptions are multi-line and grow as you type. Description-only rows (no amounts) are fine for headings and notes.
- Discounts - per line, as either a percentage (e.g.
10%) or a fixed dollar amount. Discounts show on the invoice PDF and sync to your accounting system. - Negative amounts are supported - handy for credits and adjustments on the same invoice.
- Account and tax rate - from your accounting system’s chart (or Sawfish’s own when standalone).
Add Row for more lines; the duplicate and delete icons manage existing ones. Totals - subtotal, GST, discount, and total - calculate live as you type.
Here’s a draft mid-build, showing a description-only heading row, a percentage discount, and a fixed-dollar discount:
Save it
Section titled “Save it”- Save as draft - keeps the invoice as a draft to finish later. Drafts don’t reach the client.
- Approve - approves the invoice; see Approving and sending for what happens next and the choices in the dropdown.