Your Dashboard
The dashboard is your home screen - and it’s yours to build. Every organisation starts with a Standard Dashboard covering the essentials, and you can rearrange it, strip it back, or build entirely new dashboards for different jobs.
The Standard Dashboard
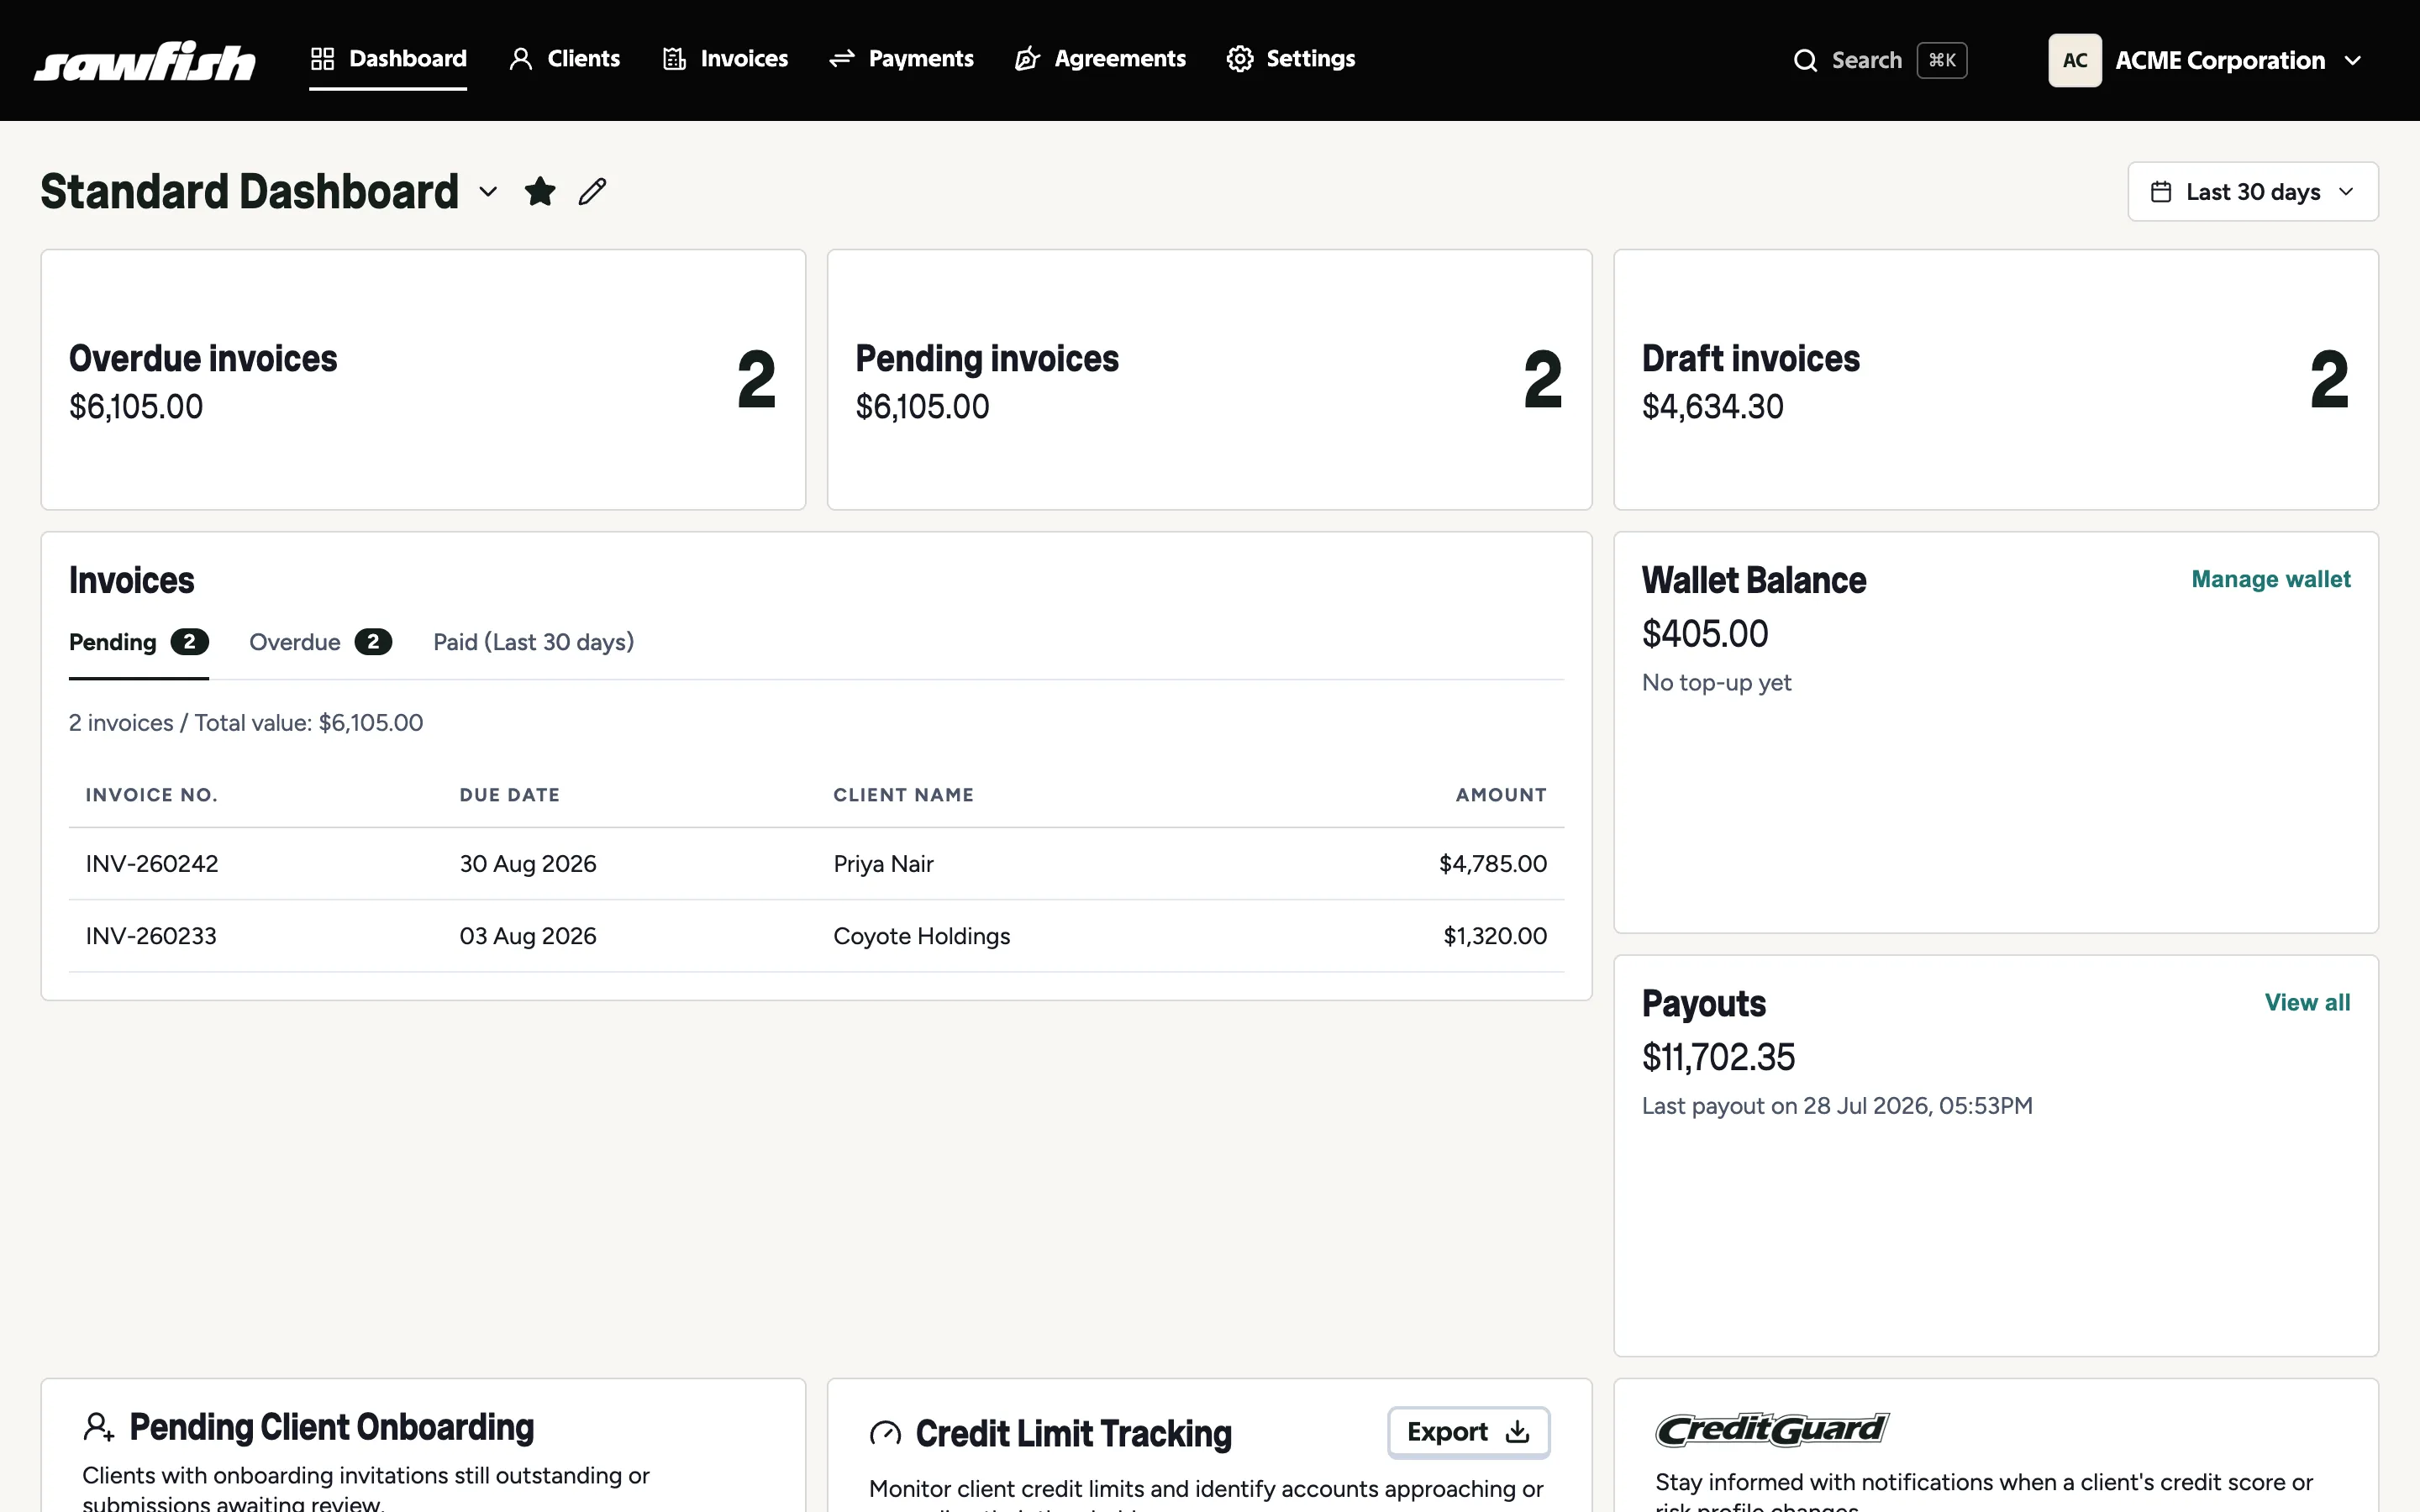
Section titled “The Standard Dashboard”Your first dashboard is created for you, with the essentials laid out: Overdue, Pending and Draft invoice summaries, the Invoices list, Wallet Balance, Payouts, Pending Client Onboarding, Credit Limit Tracking, and CreditGuard alerts. If that’s all you need, you never have to touch the editor.
The date range
Section titled “The date range”The selector in the top-right corner scopes the numbers: last 7, 30 or 90 days, or this/last week and this/last month (last 30 days by default). Statistics and every graph re-query as you switch, so the same dashboard answers “how was this week?” and “how was last quarter’s start?” without rebuilding anything.
Widgets, three ways
Section titled “Widgets, three ways”The widget library covers invoices by status, agreements by status, payments, invoices sent, statistics, wallet balance, payouts, client onboarding, credit limit warnings, CreditGuard alerts, recent SMS replies, and recent reminders. Most widgets can present as:
- Stats - the headline number (count and value),
- Graph - the trend over the selected date range, or
- Table - the underlying rows.
Switch a widget’s view with the Stats / Graph / Table chips shown on it while editing - the same widget can be a number on one dashboard and a chart on another.
Editing a dashboard
Section titled “Editing a dashboard”Click the pencil beside the dashboard name to enter edit mode:
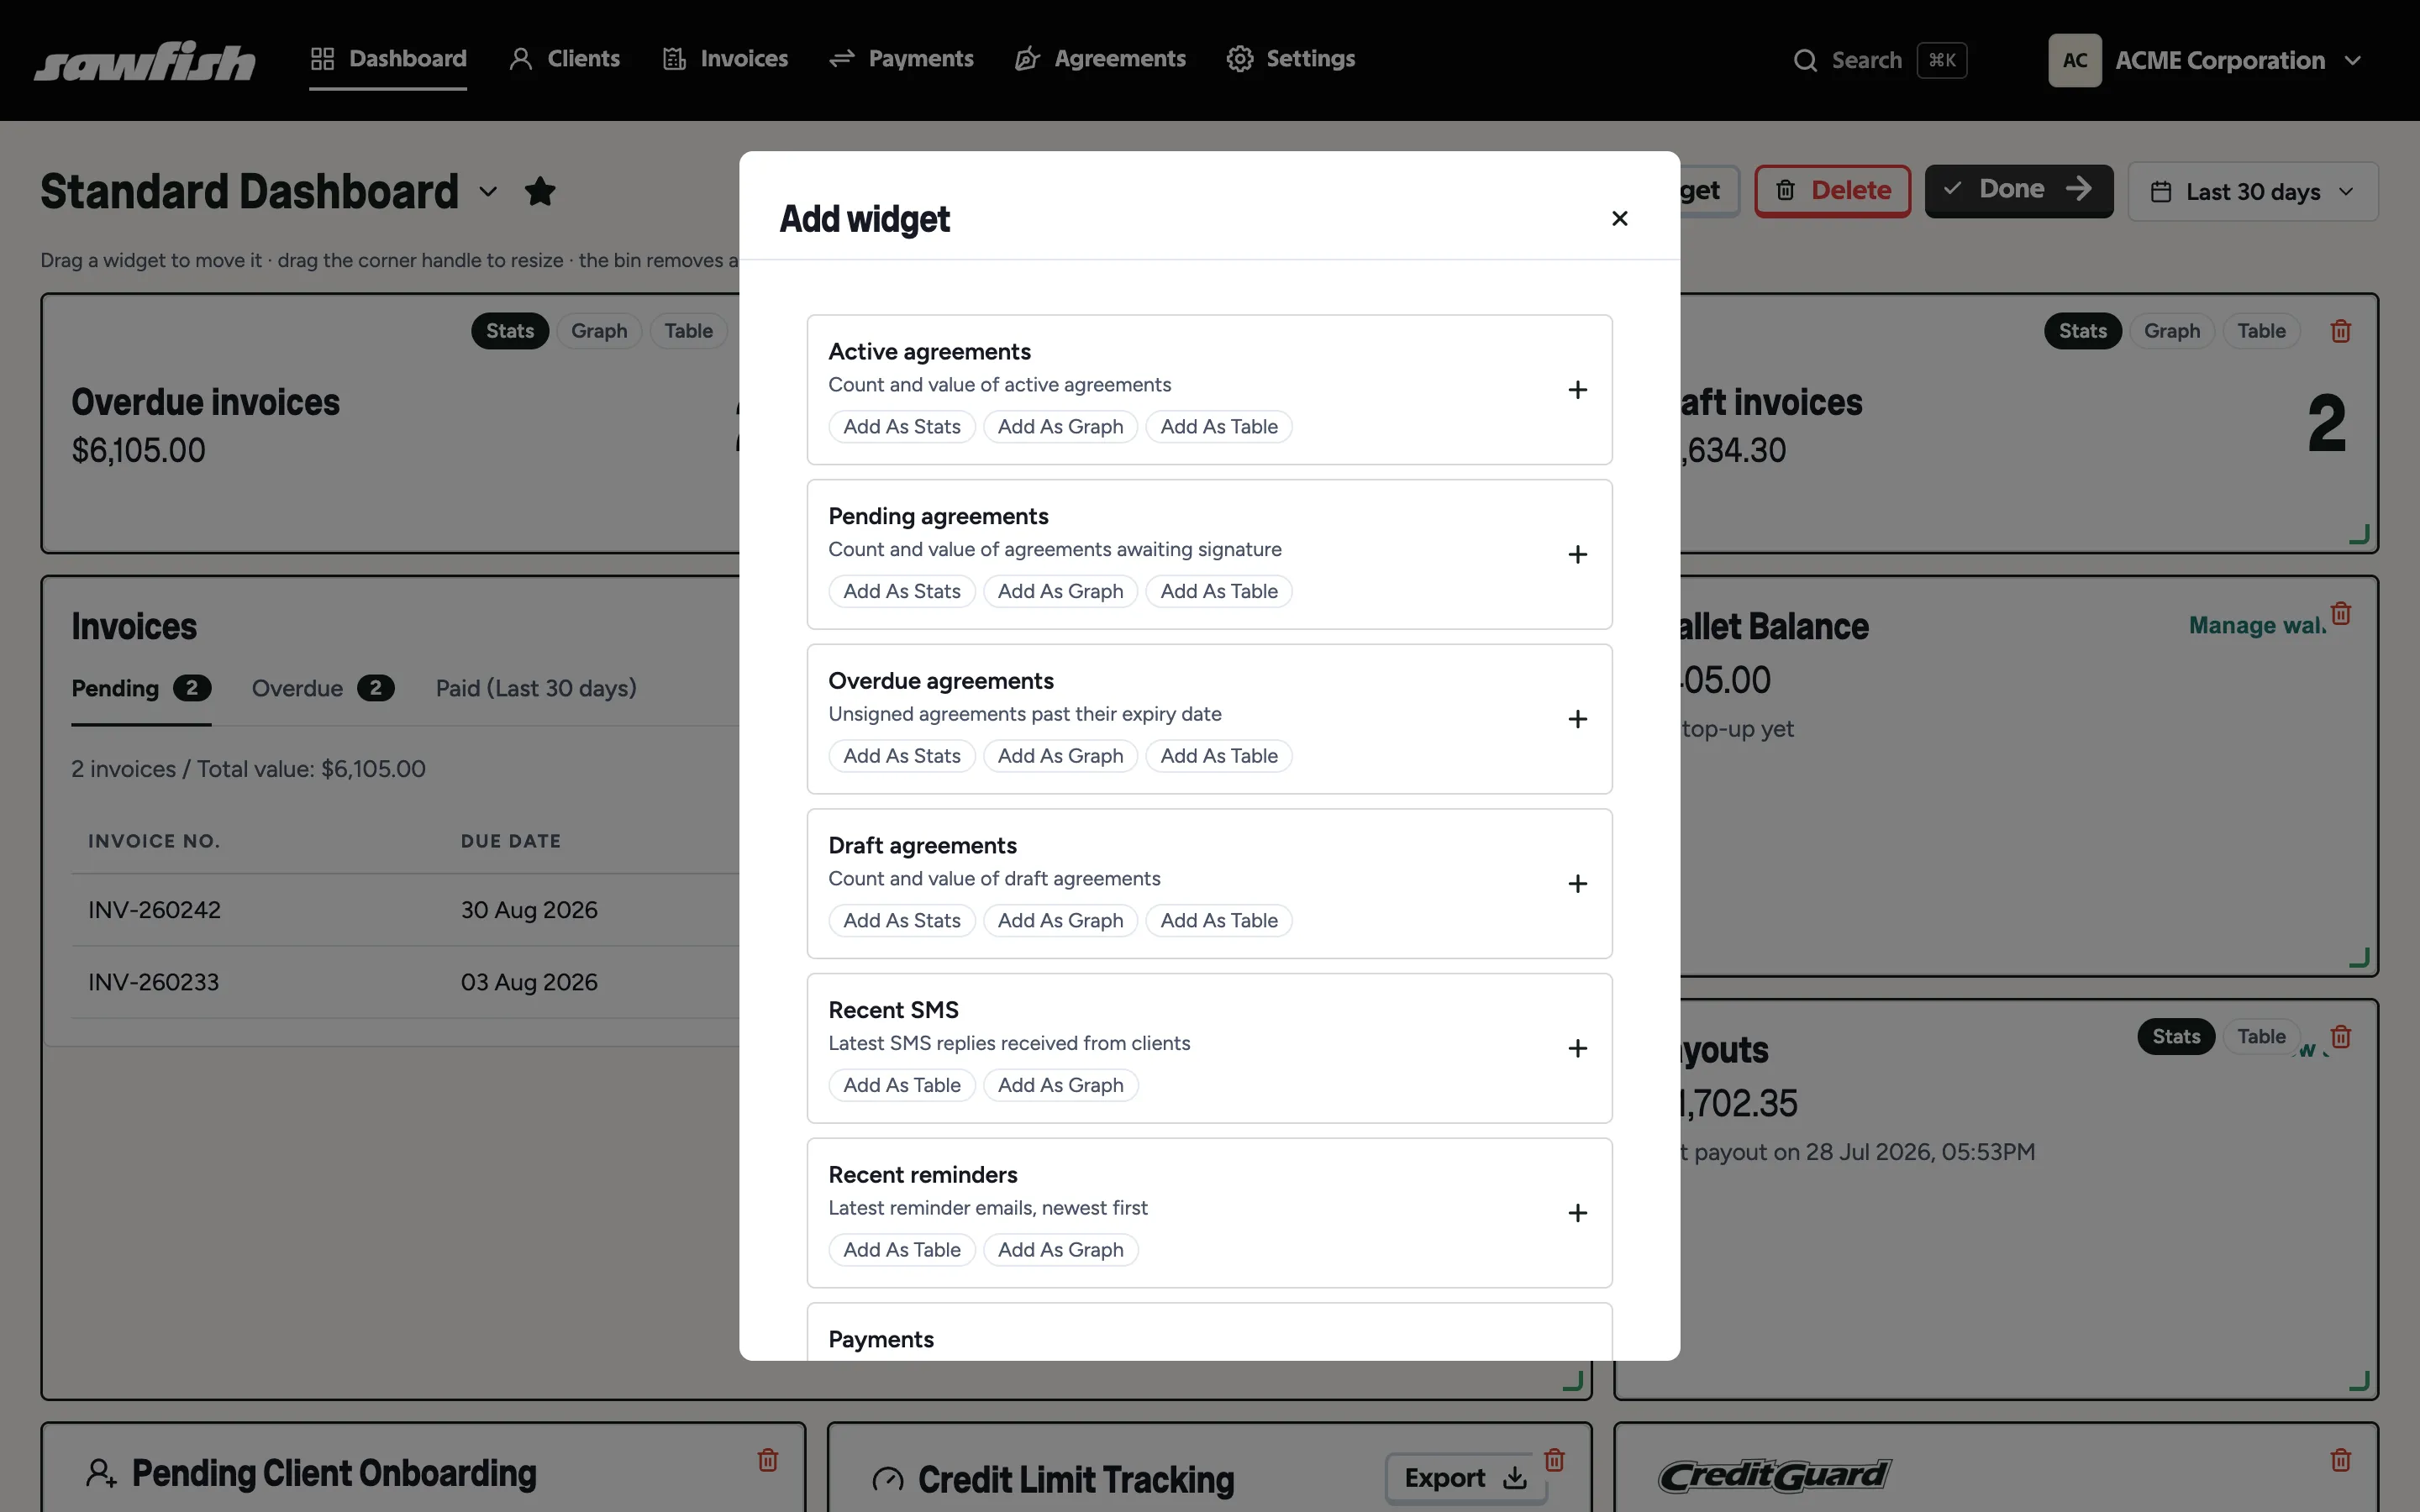
- Drag a widget to move it; drag the corner handle to resize; the bin removes it.
- Add widget opens the library - pick each widget’s presentation as you add it (Add As Stats / Graph / Table), and the modal stays open so you can add several in one visit.
- Rename and Delete manage the dashboard itself.
- Layout changes save automatically - hit Done when you’re finished.
More than one dashboard
Section titled “More than one dashboard”The arrow beside the dashboard name lists your dashboards and is where you create a New dashboard - a finance view for the bookkeeper’s visits, a collections view for chasing overdues, whatever earns its keep. The star marks your default: that’s the dashboard that greets you when you sign in.
Sharing with your team
Section titled “Sharing with your team”While editing, Share lets you choose exactly which team members can see the dashboard. Shared users get a read-only view - it appears in their dashboard list with your name on it, and they can star it as their own default. Only the owner can change the layout, so your carefully built dashboard stays built.
The navigation bar
Section titled “The navigation bar”Along the top: Dashboard, Clients, Invoices, Payments, Agreements, and Settings - the six areas of Sawfish, each covered in its own section of this guide. On the far right, your organisation switcher - see Switching Organisations.
Global search
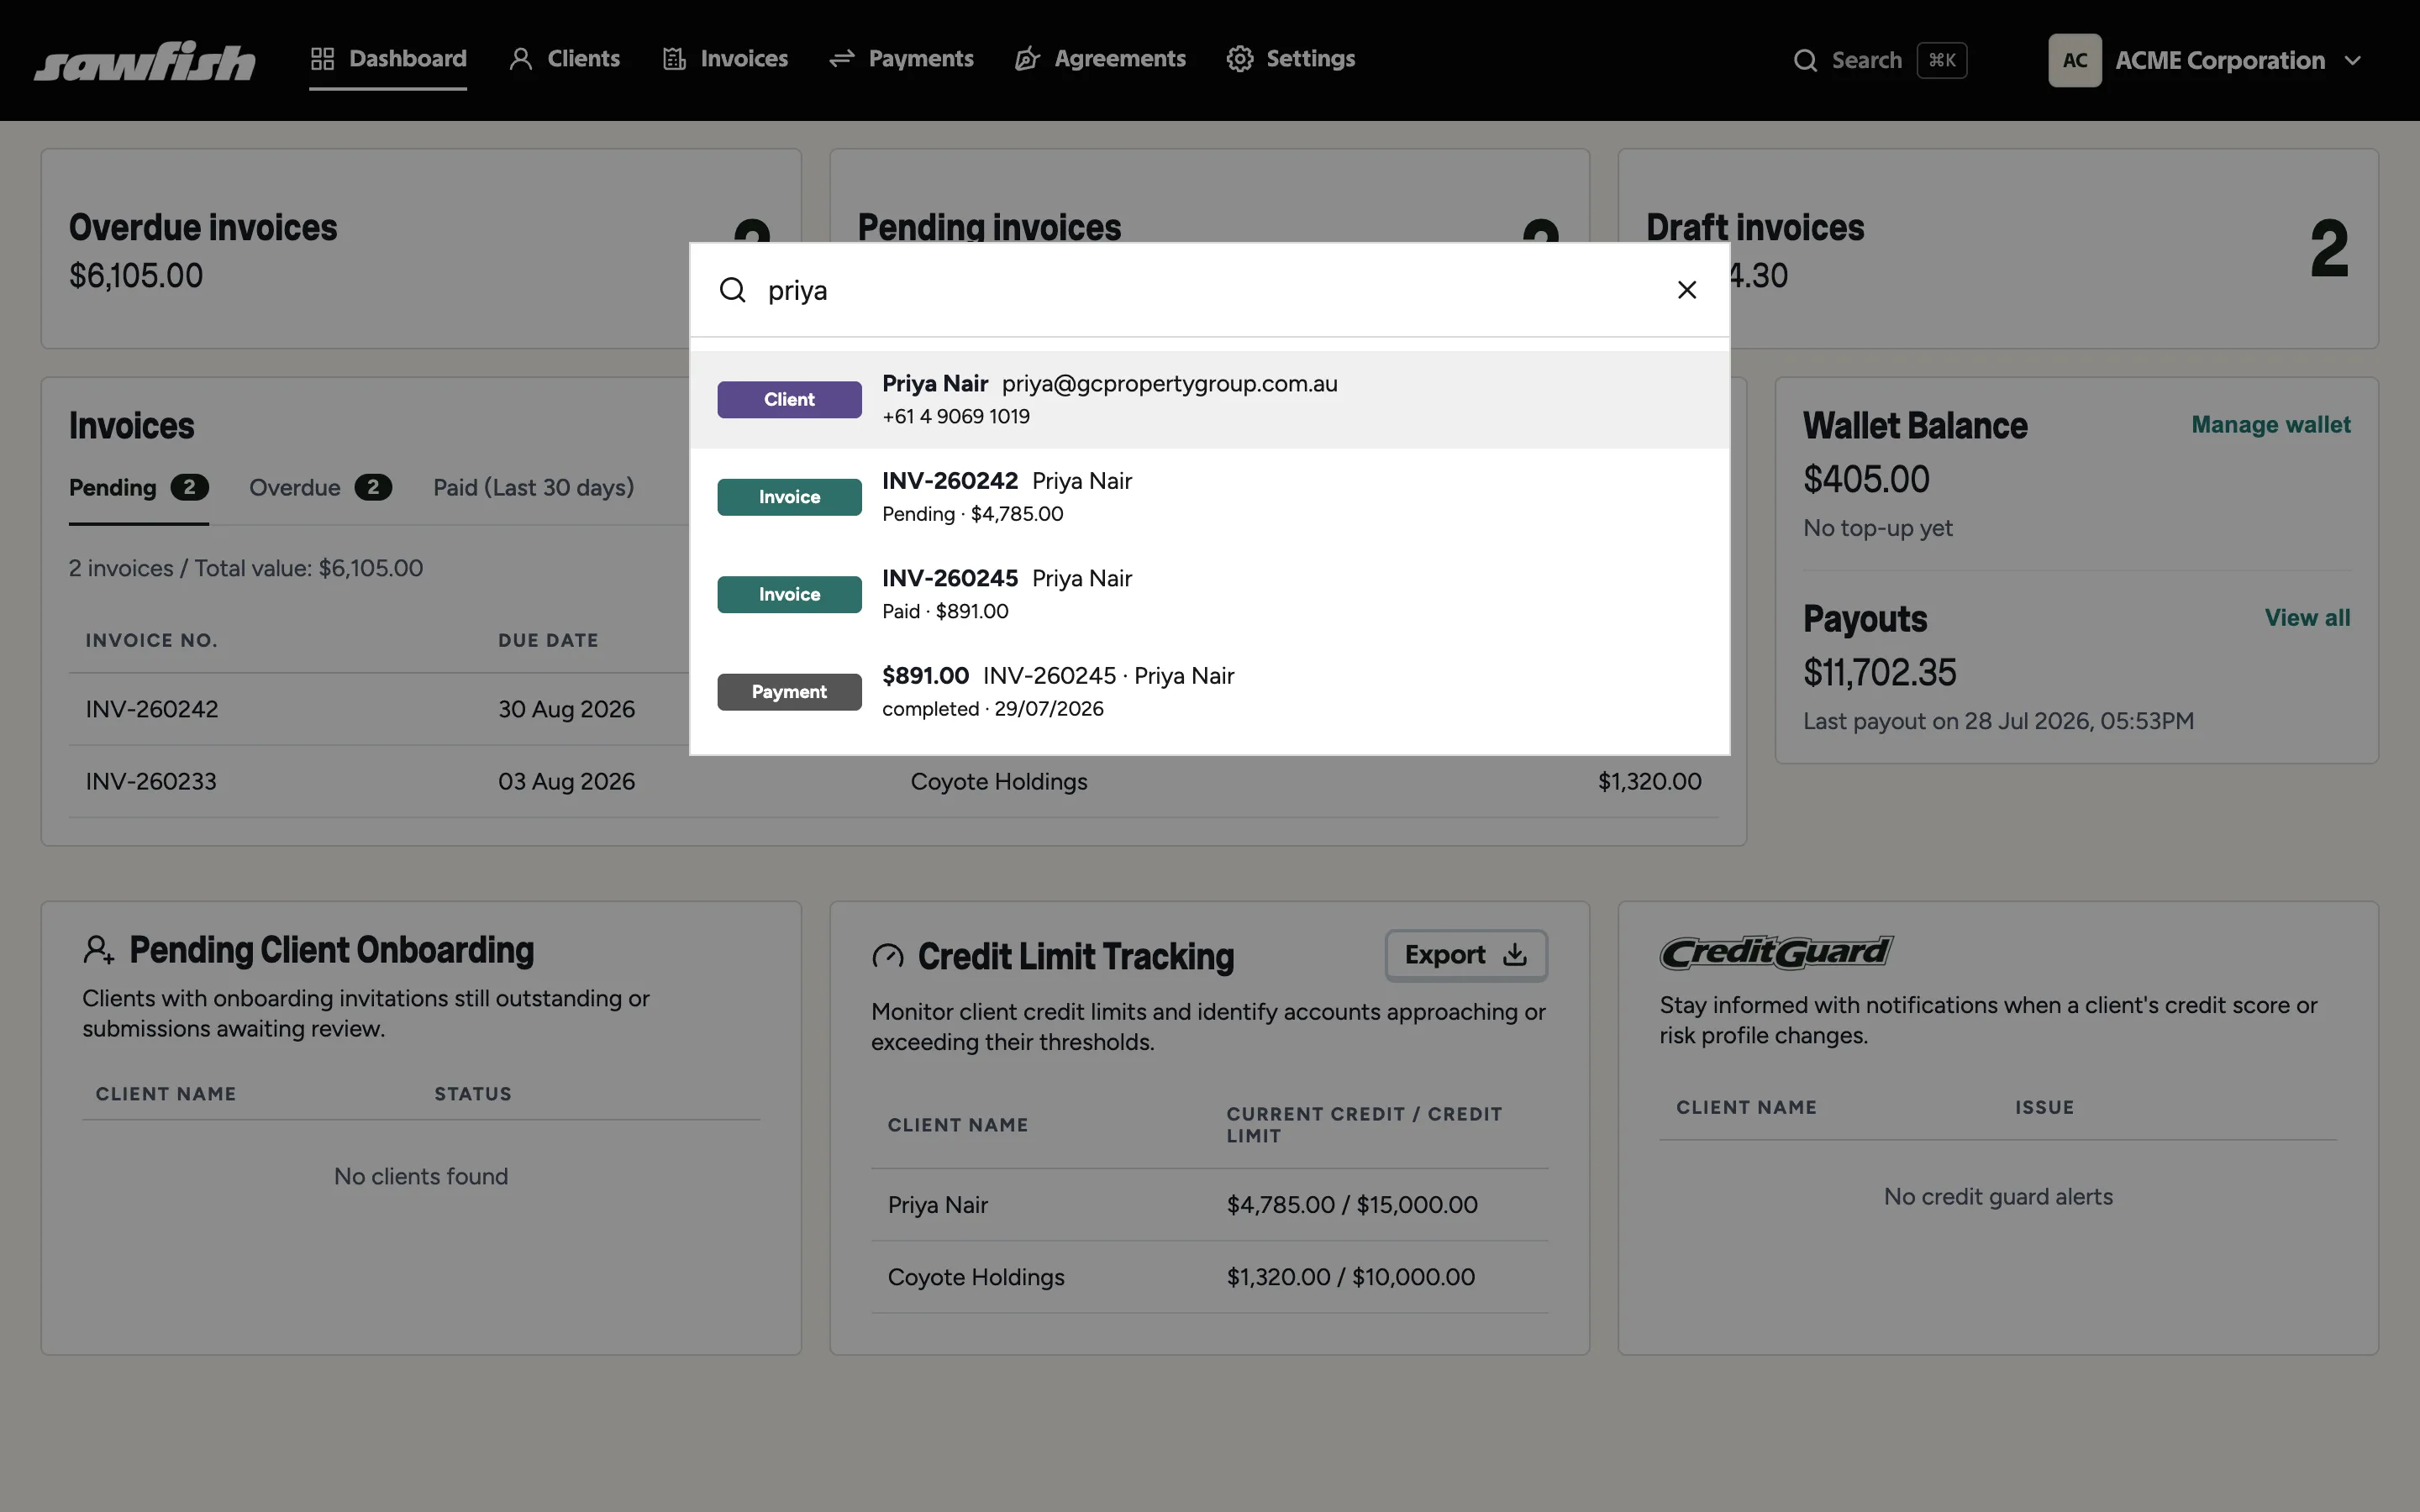
Section titled “Global search”Press Cmd+K (Ctrl+K on Windows), or click the search icon next to the organisation switcher, to open global search from anywhere in Sawfish. Type to search your organisation’s clients, invoices, payments, and agreements in one place - by name, invoice number, payment reference or amount - and pick a result to jump straight to it. Searching a client’s name also brings back their open invoices and recent payments, so a name is often the fastest route to the document you’re after.